Thursday, November 30, 2006
WHERE DID ALL MY POSTS GO!!
Tuesday, November 28, 2006
Winter Kale!
I absolutely LOVE kale,it's so beautiful! The dinosaur kale and Russian are probably my favorite greens.
So, I picked a couple heaping handfulls and made it into a really wonderful soup. I love this stuff on cold winter days. It's so easy, it always turns out great and though I admit my kids aren't totally thrilled with it yet (it's growing on them though) my non-vegan friends LOVE the stuff!

Kale and Sausage Soup
6 ounces Tofurky kielbasa (or Soyrizo works well too) , sliced,
1 large onion, chopped,
1 large clove garlic, chopped
1 teaspoon olive oil
1 pound fresh kale, washed,
26 ounces vegetable or "chicken" broth
4 cups water
2 carrots, sliced
1 teaspoon dried leaf marjoram, crumbled
1/2 teaspoon salt
1/8 teaspoon pepper
1/2 cup uncooked long-grain white rice
Saute Tofurky, onion and garlic in oil in large pot over medium-low heat until tender, about 10 minutes.
Cut off stems of kale and slice into 1/2-inch pieces. Keep stem pieces separate. Coarsely chop fresh leaves.
Add the broth, water, carrot, marjoram, salt, pepper and kale stems.
Bring to boiling. Lower heat; cover and cook for 15 minutes longer. Add the leaves at this point along with the rice to the pot. Bring to boiling. Lower the heat; cover and simmer for 15 minutes or until the rice is tender.
(I usually add a good shot of Tabasco at this point too).
Soooooooo yummy! Ahhhhhh... I wonder if I have leftovers...
Posted by
Tofu Mom (AKA Tofu-n-Sprouts)
at
10:08 PM
0
comments
Labels: kale, soup, vegan cooking
Saturday, April 22, 2006
New Mexico, Pineapple Tamales and stuff
Can't believe it's already April! Just got back from a wonderful (and W-A-Y too short) week in New Mexico.

OK, so they turned out pretty yummy, though maybe a wee bit bland. I think I'd like to try them again, and maybe spice them up - put a little cilantro and jalapeno in just for the heck of it...who knows...

1 medium-size fresh ripe pineapple, peeled, cored and cut into rough cubes
1 1/3 cups sugar
Salt
1 1/2 teaspoons baking powder
2 pounds (about 4 cups) fresh coarse-ground corn masa for tamales
1. Cover the husks with very hot water, weight with a plate to keep them submerged, and let stand for a couple of hours until the husks are pliable.
For forming the tamales, separate out 24 of the largest and most pliable husks—ones that are at least 6 inches across on the wider end and 6 or 7 inches long. If you can’t find enough good ones, overlap some of the large ones to give wide, sturdy surfaces to spread the batter on. Pat the chosen husks dry with a towel.
2. Prepare the batter. In a food processor or blender, coarsely puree the pineapple. Measure out 2 cups puree. With an electric mixer on medium-high speed, beat the coconut oil with the sugar, 1 teaspoon salt and the baking powder until light and fluffy in texture, about 3 minutes. Continue beating as you add the masa (fresh or reconstituted) in three additions. Reduce the speed to medium-low, then add the 2 cups pineapple puree. Continue beating for another minute or so, until a 1/2-teaspoon dollop of the batter floats in a cup of cold water (if it floats you can be sure the tamales will be tender and light).
Beat in a little additional water if needed to give the mixture the consistency of soft (not runny) cake batter; it should hold its shape in a spoon.
For the lightest textured tamales, refrigerate the batter for an hour or so, then rebeat, adding enough additional water to bring the mixture to the soft consistency it had before.
3. Set up the steamer. Steaming 24 husk-wrapped tamales can be done in batches in a collapsible vegetable steamer set into a large, deep saucepan. (I use my rice cooker/steamer) To steam them all at once, you need something like the kettle-size tamal steamers used in Mexico or Asian stack steamers, or you can improvise by setting a wire rack on 4 coffee or custard cups in a large kettle.
It is best to line the rack or upper part of the steamer with leftover cornhusks to protect the tamales from direct contact with the steam and to add more flavor. Make sure to leave tiny spaces between the husks so condensing steam can drain off.
4. Form the tamales.
5. When all the tamales are in the steamer, cover them with a layer of leftover cornhusks; if your husk-wrapped tamales don’t take up the entire steamer, fill in the open spaces with loosely wadded aluminum foil (to keep the tamales from falling down). Set the lid in place and steam over a constant medium heat for about 1 1/4 hours.
Tamales are done when the husk peels away from the masa easily. Let tamales stand in the steamer off the heat for a few minutes to firm up. For the best textured tamales, let them cool completely, then re-steam about 15 minutes to heat through.
Posted by
Tofu Mom (AKA Tofu-n-Sprouts)
at
10:36 PM
1 comments
Labels: New Mexico, vegan food, vegan tamales
Sunday, April 09, 2006
Sprout in Peru!
No, not me! My oldest Sprout, "J.", recently got the opportunity of a lifetime, when my parents offered to take her with them on a Mission trip to Peru!
My parents go on volunteer trips all over the world, with Maranatha Volunteers International every year, and this year they decided to invite my J-Sprout along.
So March 30, a couple weeks ago - they took off for Peru.
Yes, I was slightly teary-eyed, because even though my NOT-so-little Sprout has been away from home many times, to camp and such, she's never been out of the COUNTRY - and so far away, for so long... I'm just glad she was with her Grandma and Grandpa!
They went to a small village near Peru's capitol city, Cuzco. I guess I shouldn't say "near", because after landing in Cuzco, they had a 5 hour bus ride over narrow mountain roads to get to their work location. Once there, they stayed for a week, building a medical clinic and a small church/meeting hall and piping in fresh water for the local people. My Sprout worked right alongside the adults; lifting bricks, mixing cement and hauling sand. Her grandparents (AND I!) were very proud of her!
After their week of volunteer work, J-Sprout and grandparents headed off for more 'tourist-y' activities like visiting Machu Picchu and Lake Titicaca.

So, if you've read this far, this blog does have a 'food' point to it - and here it is: When returning from Lake Titicaca the tour group stopped in the town of Puno at a local restaurant.
My Mom, a L/O vegetarian, was fluent enough in Spanish to order a soup that they made up special just for her and my J-Sprout. (this place was pretty "tourist" oriented, so they catered to a lot of picky people and special needs). Better yet, when my Mom complimented the chef on the wonderful soup, he came out to their table and actually wrote down the recipe (in Spanish)!
Of course this recipe was one of my Sprout's favorite souviners from the trip and she had me make it her first week back. She said it was better at the restaurant (of course! ha!) but she did ask me to make it again just a couple days later, so she must like it. I know I sure did!
The soup uses already-cooked quinoa (a staple in Peru), and the vegetables are chopped very small, so it cooks very fast. Great way to use up leftovers, though when I make quinoa (I use my rice-cooker), there's rarely much in the way of leftovers.
____________________
Puno Soup
2 cloves garlic, minced
1 cup onion, chopped very small
1 large potato, peeled and cut into matchsticks
2 ribs celery, cut very small
1 med. carrot or sweet potato, cut into very small cubes (or shredded, though it makes the soup look more "messy".) (The recipe said carrot, but my Mom, who dislikes carrots, swore it was more pale and starchy, like a sweet potato)
1-2 jalapeno peppers, to taste, seeded and minced
1 Tb. olive oil (original recipe uses butter - this is the only change I made to make it "vegan")
3 cups vegetable broth
3 cups water
1/4 cup tomato sauce
1 cup cooked quinoa
2 cups fresh spinach, thinly sliced
Salt, freshly ground pepper and hot sauce to taste
Place garlic, onion, potato, celery, carrot and jalapeno in a skillet with olive oil. Saute until vegetables start to get slightly tender.
While vegetables are sauteeing, bring water, tomato sauce and broth to a boil in a med. saucepan.
Add vegetables and cooked quinoa. Bring to a boil, reduce heat, cover, and cook for 10 minutes or until potatoes are very soft. Add spinach and cook an additional 2 - 3 minutes.
Taste and adjust seasonings; add salt, pepper, hot sauce or whatever works for you.
And for those who have read this far and are still interested in the unique foods of South America, this is a GREAT blog: Vegan Findings in South America . They have some great photos too! Look at them since I haven't got mine uploaded yet.
Thursday, March 16, 2006
Kid-Friendly Mini-Pizzas
A windy day in March, (see all the downed tree branches in \/ picture below). My oldest is babysitting two little guys here at the house. I'm not sure how much work it is for her, since they happen to be good friends with my Little Sprout and they've been outside all morning....
I told her she had to come up with lunch that all the little munchkins would eat (and like) and she rummaged around my almost empty cupboards and put together these cute mini-pizzas; They have whole wheat English Muffins, spaghetti sauce, Tofutti "mozerella" slices, olives, canned mushrooms (blechh - I had no idea I had a can of those, they look like snails to me! Oh well, the kiddos seemsed to like them!) some mock-chicken stuff and red peppers. All those veggies and weird things and the little guys ate 'em just fine!
Posted by
Tofu Mom (AKA Tofu-n-Sprouts)
at
1:14 PM
0
comments
Labels: kids, vegan cooking, vegan pizza
Sunday, March 12, 2006
St. Patrick's Day Bake Sale Cupcakes
Naturally the girls' school just HAS to have a bake sale on St. Patrick's Day (I wonder why we can't salute the patron saint of Ireland with something more appropriate like snake cookies or something) and as is typical, I don't find out about it until 7:PM the night before, which leaves us scrambling to make some thing "eye-catching and appealing to grade-schoolers"...ugh...
The first recipe is a simple and basic white cake mix that I veganized without really realizing it, some time back... we added some multi-colored candy sprinkles to the batter. (Looks like that "Funfetti Cake" crap you can buy in a mix, only ours was better). It uses Egg Replacer, which you can find at Whole Foods and most health food stores, however, I have made it without the egg replacer and it came out fine - a bit more moist and dense, but still good.

White CupCakes
1 1/3 cups sugar
1/2 cup non-hydrogenated vegan margarine
3 cups unbleached flour
1 T. baking powder
3/4 t. salt
1 Tb. EnerGee Egg Replacer powder
2 cups soy milk, rice milk, or other non-dairy milk of choice
1 T. vanilla
1 t. almond extract
1/4 cup confetti cake decorating sprinkles
Lightly oil a 9x13-inch pan and set aside. (Or in this case, we used Mini-Bundt pans.
Using an electric mixer or in a large bowl with a hand held mixer, place the sugar and mqargerine, and cream together until light and fluffy. In another bowl, sift together the flour, baking powder, Energee Egg replacer and salt.
Add dry ingredients into the creamed mixture, alternating with the soy milk, and continuing to beat the mixture well between each addition. Add the vanilla and almond extract and beat the mixture an additional 2 minutes at medium speed. Gently stir in the confettis.
Glaze or frost as desired.
________________
The second recipe (for the chocolate cupcakes) is much healthier and probably a little more labor-intensive, but my 12-year-old managed to make these just fine with no help from me...
We chose to use it because we happened to have the ingredients available. (I was SO not in the mood to go to the grocer at 7:PM!!). Ironically, I got this recipe from a "Healthy Cooking" class that I attended years ago. I've since modified the recipe quite a bit to suit my preferences.
This makes a really dense, rich, moist chocolate cake/cupcake. Just the way chocolate should be...
I included a chocolate icing recipe here, though for this particular event, we used store bought frosting that we had on hand. (Read your labels, but most store-bought frostings are "accidently" vegan, though they will be loaded with all sorts of gacky hydrogenated oils and such).

1 cup whole-wheat pastry flour
1 cup unbleached all-purpose flour
1/4 cup cocoa powder (or you can use carob powder if you're in to that sort of thing, which I am not!)
1 teaspoon salt
1 cup chocolate soymilk
3/4 cup sugar (the recipe calls for honey, or pure maple syrup)
1/2 cup hot, well-cooked long-grain brown or white rice
1/4 cup canola oil
1 teaspoon pure vanilla extract
Preheat oven to 350 degrees.
Oil two 8" round cake pans or 12 cupcake tins; set aside.
Whisk together dry ingredients in a large mixing bowl; set aside.
Combine wet ingredients in a blender container, and blend until very smooth.
Add wet ingredients to dry ingredients, and stir to combine. Pour batter into prepared pans. Bake 20 to 25 minutes for cakes, 15 to 20 minutes for cupcakes, until a toothpick inserted in the middle of the cake or cupcake emerges clean. Cool slightly before turning onto a wire rack.
___________
Glaze/Icing
1 cup sugar
6 T corn starch
4 T cocoa
1/2 t salt
2 T oil
1 cup water
1/2 t vanilla
Mix sugar, cornstarch, salt, and cocoa in a medium sauce pan. Whisk in the water. Heat over medium until it gets thick and starts to boil. Boil for 1-2 minutes (make sure you don't boil too long, or it will set like toffee). Remove from heat and stir in oil and vanilla. Cool and spread on cooled cake. If you prefer a thinner glaze, add more water.
Posted by
Tofu Mom (AKA Tofu-n-Sprouts)
at
8:48 PM
1 comments
Labels: bake sale, baking, cupcakes, vegan cooking
Thursday, February 09, 2006
Shortbread Cookies
<-- My littlest Sprout takes cookies in to school tomorrow for a Valentine's party.
Instead of something more traditional (well, OK, I'm not exactly sure what would be considered "traditional" treats for Valentine's anyway - pink cupcakes? blechh...yeah...) she wanted to make shortbread cookies.
So naturally I hadn't tried "veganizing" my shortbread recipe yet, and didn't have time to experiment, but we tweaked it only slightly and it turned out GREAT. Here ya go...
-- 3/4 cup of margarine (the kind in cubes, like Earth Balance Buttery Sticks - NOT the softer tub-style)
-- 2 TB (or a bit less) coconut oil
-- 1/2 cup powdered sugar
-- 2 cups flour (sometimes I use whole wheat pastry flour)
-- 1/4 teaspoon vanilla (oh please use real vanilla!)
1. Preheat oven to 350F and lightly grease a baking sheet.
2. Cream margarine and sugar very, very well.
3. Add vanilla.
4. Add flour slowly.
5. When well incorporated and forming a dough, roll into a ball and refrigerate for at least 20 minutes, to overnight. (We couldn't wait much longer than 20 min!)
6. Flour surface and rolling pin, and roll out a 1/4 of the dough out a time to between 1/4 and 1/2 in. thick. (Thicker will be more dense and shortbread-like, thinner will be more crisp, we made ours pretty thick!) Cut out using cookie cutters of choice.
7. Bake until the edges begin to brown, 6-10 minutes. Keep an eye on it, depending on how thick you roll the dough.
Posted by
Tofu Mom (AKA Tofu-n-Sprouts)
at
5:40 PM
1 comments
Labels: baking, cookies, valentine's, vegan
Sunday, January 29, 2006
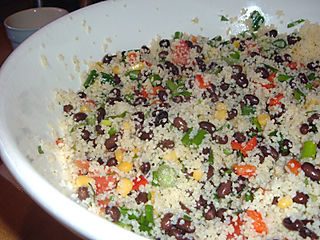
Confetti Couscous
Posted by
Tofu Mom (AKA Tofu-n-Sprouts)
at
1:28 PM
2
comments
Labels: couscous, vegan, vegetables
Friday, January 20, 2006
BEST EVER, FOOLPROOF, VEGAN CHOCOLATE CHIP COOKIIES!
Perfect Chocolate Chip Cookie recipes are tough to find, even if you're using butter, eggs and whatever else. My 12-year-old adjusted this recipe from an old family favorite one day when she was home alone and wanted to surprise me with some vegan cookies. We didn't exactly have "enough" of several crucial ingredients so she substituted - played around with the recipe and the end result was the most wonderful cookies EVER!!
It is honestly AMAZING (hence the name). Now her recipe is famous among family, friends and her classmates, most of whom had never heard the word "vegan" before - at least now they associate the word with yummy cookie goodness.
_____________
Amazing Vegan Chocolate Chip Cookies
2 1/4 cup all-purpose flour
1 tsp. baking soda
1 tsp. salt
1/2 cup coconut oil
1/4 cup Smart Balance Light (or regular Earth Balance will work fine too, though for some reason SB Light works the best)
3/4 cup white sugar
3/4 cup packed brown sugar
1 heaping Tbsp. flax meal
1 heaping Tbsp. Ener-G egg replacer powder
1/4 cup soy milk
1 tsp. vanilla
2 cups vegan chocolate chips (Good quality vegan chocolate chips are absolutely essential here. Guittard Semi-Sweet is my favorite - available in regular grocery stores and VEGAN!)
1.) Preheat oven to 375 F.
2.) In a small bowl, mix soy milk VERY WELL (until creamy) with Ener-G egg replacer and flax meal using an electric mixer or hand (immersion) blender. Set aside.
3.) In another bowl, mix together flour, baking soda and salt. Set Aside.
4.) In a large bowl, cream together coconut oil, Smart Balance and sugars. Add soy/flax mixture and vanilla. Beat with electric mixer until smooth.
5.) Gradually add flour mixture to liquids. Stir in chocolate chips.
6.) Drop by well rounded teaspoonfuls onto ungreased cookie sheet. Bake for 8 - 10 min. until lightly golden. (Can also be made into bar cookies in 9 X 12 pan)
You can add nuts, raisins, coconut, whatever... but we like them just as they are!
Posted by
Tofu Mom (AKA Tofu-n-Sprouts)
at
9:18 PM
8
comments
Labels: baking, chocolate chip, cookies, vegan
Wednesday, January 11, 2006
Hot Cocoa and a Snow Day
Posted by
Tofu Mom (AKA Tofu-n-Sprouts)
at
12:15 PM
0
comments
Labels: Candy canes, Christmas, cocoa, snow, vegan
Thursday, January 05, 2006
Red and Green for Christmas
After spending a couple vacations last year, with friends and relatives in New Mexico, I've been wanting to write down a few of the ideas and recipes I've come away with. The food there is amazing; colorful, flavorful, creative and full of ingredients or combinations I'd never tried. I fell absolutely in love with (among other things) the green chiles that New Mexico is so famous for.
There are as many definitions for "chile"as there are people in New Mexico, but most simply it's either "red or green". Either its the famous green New Mexico-grown chile peppers (especially the Hatch chiles, grown in southern New Mexico) that are roasted over a fire until their skins blacken and char. The skins get peeled off and the soft chiles are chopped and cooked in whatever recipe.
Its counterpart, the red chile, which is the same pepper, but picked later in the season so it is red (ripe) and then dried, ground into powder and blended with liquid to make a red sauce. You also see the dried red pods made into beautiful chile ristras (strings or wreaths of chiles) for sale all over Santa Fe and Albuquerque's Old Town. (Well, everywhere actually, I just happened to see them a lot in the "tourist-y" places because that's where I went mostly, this trip).

Spanish settlers brought the chile pepper into what is now New Mexico in the 1600s, and it is now the state's largest agricultural crop; it's consumed at every meal, celebrated in songs and at festivals, and is the subject of the Official New Mexico State Question, "Red or green". The question refers to the color of chile you want on your food and you'll get asked at every Mexican (or New Mexican, sorry!!) restaurant.
I think the reason the rest of us know so little about New Mexico's green chiles is because they don't transport so well. They're a fresh and seasonal vegetable, (well, yes, technically a fruit) and the only way to really appreciate them is freshly fire- roasted, though the fire-roasted and frozen variety are pretty close if that's your second choice. Canned slimy green chiles are not even an option.
OK then. So this past Christmas break, I spent some time in New Mexico, and returned with my tummy full of green chile and my brain full of recipes, ideas and happy memories.

(I know, the picture doesn't look
all that great, but it IS yummy
stuff!)
OK, so, first of all, one of my new favorites, Green Chile Stew. This stuff is addictive, it doesn't have to be SUPER spicy but I tend to like it that way. With all those Vitimin-C-filled chile peppers, it's great for a cold and (I discovered), it's sorta like meatloaf or apple pie, there are hundreds of slightly different versions of the "official" recipe! Normally it has pork or something dead and disgusting in it, but here's the vegan version that I learned from one of my wonderful veggie freinds.
1 pkg. Boca crumbles or 1 pkg. Morningstar Farms Beef Meal Starter Strips or if you prefer something else, go for it...
2 Tbsp. vegetable oil
1 large onion, chopped
2 cloves garlic, minced
2 cups roasted, peeled and chopped New Mexico green chiles
1 large potato, peeled and diced
2 tomatoes, peeled and chopped
3 to 4 cups water
1/4 teaspoon dried oregano, Mexican preferred
Place the Crumbles or Meal Starter strips in a skillet and brown a bit in the oil, remove and place it in a kettle or stock pot.
Put the onions in the skillet, adding more oil if necessary, and sauté until they are browned. Add the garlic and cook for an additional couple of minutes. Remove them from the skillet and add to the 'meat'.
________________
Another new favorite for me is Posole. (Also spelled 'Pozole'). Posole is a New Mexican soup traditionally served on Christmas Eve. It is made with a type of corn, hominy really, that's been treated with lime (I know, sounds weird). You buy it dry, soak it forever, and when the kernals start to burst, it's time to cook the rest of the soup. Posole is also 'traditionally' made with pigs feet. Obviously I left those out (UGH!). I love creating my own traditions with veganized versions of regional and cultural favorites and this is a great example, though in all honesty, I got the recipe - or general idea - from a friend who's lived in NM basically all his life.
My 6-year-old goes NUTS over this stuff, she'll eat three bowlfulls in a row, with really HOT green chile sauce (though I think it's 'traditionally' served with red, once again, there we go, breaking tradition).
I have to buy the dried posole corn or hominy (or cacahuazintle is technically what it says on the package) in New Mexico, or at a tiny little specialty market in Seattle, or bribe a friend to mail some to me, so we don't make this as often as my kids would like. Canned hominy is JUST not the same. I tried it, it was AWFUL!
POSOLE SOUP
1/4 c. vegetable oil
2 c. chopped onion
2 T. minced garlic
1 oz. New Mexico dried red chile pods, (4 or 5 pods, stems and seeds removed)
5 c. vegetarian UNchicken broth
pinch of cumin and Mexican oregano
1/2 c. coarsely chopped cilantro
2 t. salt, or to taste
Soak posole/hominy corn in a large amount of water overnight (it will swell quite a bit!!). The next morning, cook posole in water in crockpot on low for about another 12 hours until the kernels have softened and begin to burst. Drain the posole and rinse well.
Heat the oil in a 6-quart pot and sauté the onions until golden. Add the garlic and sauté for 1 minute. Add the posole, dried chiles, broth, cumin and oregano. Bring to a boil. Reduce the heat and simmer for 30 minutes. Add the salt, to taste, and continue cooking for 30 minutes. Stir in the cilantro. Taste and adjust seasonings.
Serve with warm red chile sauce on the side. Yum!
**In the picture I took above, I had added some red and green bell peppers for a little extra interest though they're not necessary.
Posted by
Tofu Mom (AKA Tofu-n-Sprouts)
at
10:52 AM
0
comments
Labels: chile, cooking, green chile stew, New Mexico, posole, vegan
Tuesday, December 20, 2005
Vegan Christmas Baking: GINGERBREAD!

VEGAN GINGERBREAD!
I realize some of the candies you'll see pictured are NOT vegan but the gingerbread is, and actually VERY tasty. Besides making the sheets of gingerbread for the houses, I always make plenty extra, just to be baked into cookies that we eat...
1/3 cup canola oil
3/4 cup sugar
1/4 cup molasses
1/4 cup plain soymilk
2 cups whole wheat pastry flour or all-purpose flour (or a mix of both)
1/2 teaspoon baking soda
1/2 teaspoon baking powder
1/2 teaspoon salt
spice blend:
1/2 teaspoon each ground nutmeg, cloves and cinnamon
1 1/2 teaspoons ground ginger
Directions:
In a large bowl beat together oil and sugar for about 3 minutes. Add molasses and soymilk. The molasses and soymilk won't really blend with the oil but that's ok.
In a seperate bowl, sift together all the other ingredients.
Add the dry ingredients to the wet in batches. MIx together with a firm spoon or spatula until well combined. You should have a pretty stiff dough. Flatten the dough into a disk, wrap in plastic wrap and chill for an hour or up to 3 days in advance. (If you chill longer than an hour you may want to let it sit for 10 minutes to loosen up a bit before proceeding).
Preheat oven to 350 F. Lightly grease your cookie sheets.
On a floured surface roll you dough out to a little less than 1/4 inch thick. You can do this in 2 batches if you don't have the space. Cut out your shapes with your cookie cutters and gently place on cookie sheets (if you are using them to decorate with remember to cut a hole with a straw or something before baking).
Bake for 8 minutes.Remove from oven and let them cool for 2 minutes on the baking sheet then move to a cooling rack. Wait until they are completely cool before icing.
If baking "walls" for a gingerbread house, make cookies 1/2 inch thick and bake at 300 F until very firm - about 15 minutes or longer. Then let cook on a rack overnight.
Friday, December 16, 2005
Christmas baking! YAY! ~~ "Cranberry-Orange Bread"
2 cups all-purpose flour
1 cup vegan sugar
1/2 teaspoon salt
1 1/2 teaspoon baking powder
1/2 teaspoon baking soda
2 Tblsp vegetable oil
hot water
1/2 cup unsweetened (fresh squeezed) orange juice
(I use juice from those tiny tangerines you get around the holidays)
1/2 Tblsp orange peel, grated
Ener-G Egg Replacer for 1 egg
1 cup cranberries, coarsely chopped (fresh or frozen)
1/2 cup hazlenuts, chopped
Directions: Preheat oven at 375 F.
Grease and flour loaf pan.
In a large bowl, mix dry ingredients (flour, vegan sugar, salt, baking powder and baking soda).
In a small bowl, add nuts, cranberries and 1/2 cup of dry mixture to coat the nuts and berries.
In a measuring cup, add oil and top-up with hot water to make 3/4 cup. In a medium bowl, mix oil/water mixture, orange juice, orange peel and Ener-G Egg Replacer. Combine liquid mixture to dry mixture (don't overmix!).
Fold in nuts and berries. Bake for 1 hour.
Friday, November 11, 2005
More "Pumpkin-y-ness"...
WARM CIDER SYRUP:
3/4 cup apple cider or juice
1/2 packed brown sugar
1/2 cup corn syrup
2 Tbs Earth Balance margarine
1/2 tsp lemon juice
1/8 tsp ground nutmeg
1/8 tsp ground cinnamon
PANCAKES:
1 cup all-purpose flour
1 Tbs sugar
2 tsp baking powder
1/8 tsp salt
1/2 tsp ground cinnamon
1/2 tsp ground nutmeg
1/8 tsp ground cloves
3 tsp Ener-G egg replacer
4 tbs warm water
1 1/3 cup soy milk
1/4 cup canned pumpkin
2 Tbs canola oil
Instructions:------------
SYRUP:In a saucepan, combine all the syrup ingredients.
Bring to a boil over medium heat, stirring occasionally.
Reduce heat simmer uncovered for about 20 minutes until slightly thickened. Let cool for 30 minutes before serving. Syrup will thicken as it cools.
Any syrup you don't use can be stored in a sealed container in the refrigerator. Just warm it in the microwave for 1 minute before serving. If it gets too thick you can add a little more cider to thin it.
PANCAKES:Sift together all dry pancake ingredients except for egg replacer.
In another bowl whisk together the pumpkin, soy milk and oil.
Mix together egg replacer and water and stir it in with the pumpkin mixture. Stir dry ingredients in with wet ingredients.
Ladle batter onto a hot greased griddle. Turn when the bubbles on the top start to pop and the outer edge of the pancake starts to look set.
Serve with Earth Balance margarine and warm cider syrup.
Don't be tempted to add extra pumpkin. Too much pumpkin will cause the pancakes not to cook all the way through. Also they may take a little longer too cook than traditional style pancakes so be patient and wait till the sides start to look a little cooked and the bubbles on top actually start popping.
The cider syrup is very sweet. A little bit goes a long way, so don't pour too much on at once.
Monday, November 07, 2005
Pumpkins and Vegan Thanksgiving!
In other words, it wasn't as hard as I was thinking it'd be.
So with Thanksgiving rolling around, I thought I'd post some of the recipes I think we'll be using this year. Recipes I've used for years and just "veganized" to fit my new style of eating.
Since we're big pumpkin/squash fans around here, I thought I'd devote a little space to some of our favorites. (I usually try to grow my own squash - OR liberate a few from the vast acreage my Mom calls a garden.) We do eat things OTHER than pumpkin for Thanksgiving, but I'll save those for another day.

Pumpkin Soup!
My kids BEG for it. (Great source of fiber and those "yellow veggie" antioxidants and Vit. A too!) You can spice it up or down, according to how hot you like your curry.
2 Tbsp. margerine
1 small onion, chopped
1 small garlic clove, pressed
2 tsp. curry powder or paste, or to taste
1/2 tsp salt
1/4 tsp freshly-ground black pepper
cayenne to taste
2 Tb. sugar
1 Tb. very fine grated fresh ginger
1 can vegetarian chicken broth - (14 1/2 oz)
PLUS1 can water
3 cups pumpkin or squash puree - either from a can, frozen or bake/steam your own and mash (my fav.) **See Note following
3/4 cup coconut milk (or 1 can of it is fine, so there's no waste)
Instructions:--------------
Melt margerine in a large saucepan over medium heat.
Cook onion 5 minutes, until softened.
Add garlic, curry powder, ginger, salt and pepper and cook 1 minute more.
Add broth, sugar, water and puree; mix well.
Reduce heat to low.
Cook, stirring occasionally, for 20 minutes.
Stir in coconut milk.
Puree soup in blender in batches until smooth.
Heat through before serving.
Adjust seasonings - sometimes needs a pinch more sugar, or salt or cayenne - depending on your tastes.
**I cut small sugar pumpkins or Kabocha squash in quarters and bake until soft, then puree with a little vegetable broth for this recipe.
~~~~~~~~~~~
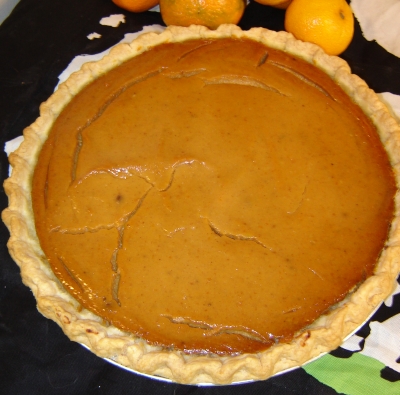
Next up is your classic Thanksgiving Pumpkin Pie (only vegan). I've got to confess, we've tried all those tofu-filled vegan pumpkin pie recipes out there, and while I DO like tofu... a LOT... I don't care for it all that much in a pie.
I think you CAN taste the tofu, despite claims from other vegans that it's "exactly the same". So with the help of a half-dozen Internet resources, my daughter and I came up with this non-tofu version and we think it's GREAT.
VEGAN PUMPKIN PIE
(Preheat oven to 350 degrees F.)
--2 c. solid-pack canned pumpkin (if you use home-cooked pumpkin, drain it forseveral hours through coffee filters or a cheesecloth)
--3/4 cup soy milk (not non-fat)
--1/4 cup coconut milk
--3/4 c. sugar
--1/4 c. cornstarch
--1 T. molasses or maple syrup
--1 tsp. ground cinnamon
--1 tsp. vanilla
--1/2 tsp. EACH ground ginger, nutmeg and salt
--1/4 tsp. ground allspice or cloves.
Pour the filling into the pastry and bake 60 minutes, covering the edges with foil if they begin to brown too quickly.
Cool on a rack, then refrigerate overnight before serving.
It definitely needs to sit overnight but it will set up firm and the flavors will blend nicely!
3/4 cup raw wild rice, rinsed
1 tablespoon light olive oil
1 heaping cup chopped red onion
1 clove garlic, minced
2 1/2 cups firmly packed torn whole wheat bread
1 tablespoon sesame seeds
1/2 teaspoon each: dried sage, dried thyme
1 teaspoon seasoned salt, or to taste
1 cup fresh orange juice
Preheat the oven to 375 degrees.
Cut off top of pumpkin and scoop out seeds (save those and roast later!)
Cover pumpkin with foil and bake about an hour or until easily pierced with a knife but still firm.
(Or halve small squashes and scoop out seeds. Place cut side up in shallow baking dishes and cover tightly with covers or more foil. Bake for 40 to 50 minutes, or until easily pierced with a knife but still firm.)
In the meantime, bring 2 cups of water to a boil in a saucepan. Stir in the wild rice, reduce to a simmer, then cover and cook until the water is absorbed, about 40 minutes. Heat the oil in a skillet.
Add the onion and garlic and sauté until golden. In a mixing bowl, combine the cooked wild rice with the sautéed onion and the remaining ingredients.
When the pumpkin or squashes are cool enough to handle, scoop out the pulp, leaving firm shells about 1/2 inch thick. Chop the pulp and stir it into the rice mixture.
Taste and adjust seasonings. (I like a LOT of sage and garlic so usually add more).
Stuff the pumpkin or squashes, place in foil-lined baking dishes, and cover.
Before serving, place in a preheated 350 degree oven. Bake for 15 to 20 minutes, or just until heated through (longer for pumpkin, less for squashes).
Serve as your Thanksgiving centerpiece and hear everyone rave...
VARIATION: To add drama to this (drama is always good, isn't it?), try it with other squash varieties. Hubbard squash, delicata, sweet dumpling and golden nugget are just a few ideas - I use whatever's available...
Seriously, I found the recipe a few weeks ago and thought it looked pretty good. My kids did not, however, so when I made it, it was served to very skeptical faces; But I'm happy to report the older girls loved it (as did I) and it's on our "list" of new Autumn pumpkin favorites!
ETA: I just realized I wrote this as I was making/veganizing it the first time, so the ingredients are all out of order, I'll probably come back and edit some time soon, you can probably still figure it out with no problem, I have faith in your cooking skills if you've made it this far!!!.
3/4 cup pumpkin puree
1 Tb. cornstarch
8 ounces silken tofu
2 tbsp. lemon juice
1 tsp. Italian Spice Blend
1 tsp. sage
1-2 tsp. chopped garlic
salt and pepper
dash nutmeg
1/2 cup shredded soy mozzarella,(freeze it first if it won't shred)
1/4 cup nutritional yeast
1/2 cup chopped and defrosted frozen spinach
12 no boil pasta lasagna-noodle sheets
1/2 large onion, chopped
8 ounces mushrooms, sliced
3 cups tomato sauce
1 tsp. sugar
1/2 cup soy milk
1/2 cup soy cheese, shredded
Instructions:
Preheat oven to 350 degrees.
Mix the tomato sauce, soymilk and sugar together. It should look reddish pink.
Place a small amount of this sauce in an oiled 9x12 baking pan.
Lay 3 pasta sheets in there, take a fourth and break to fill in bottom of pan.
Mix the tofu, cornstarch,Tofutti cream cheese, lemon juice, garlic, salt and pepper together with a hand mixer. (This is your "ricotta" substitute.)
Add in the pumpkin, mushrooms, vegan mozzarella, spinach, onions, nutmeg, sage and Italian Spices, nutritional yeast and mix with the "ricotta cheese". Put a layer of this mixture in the pan.
Continue to layer sauce, vegetable-pumpkin-"cheese" mixture, noodles, and sauce until all is used up.
Top with sauce. Cover with foil and cook about 50 minutes or so. Remove foil, sprinkle with the soy cheese.
Bake until cheese melts, (if it does, which vegan cheese doesn't too well...) but about 10 minutes or so. Let stand for about 10-20 minutes and serve.
Wickedly rich and SOO yummy! All you need is a salad. (I did a spinach salad with shaved pieces of jicama and it was perfect.) BTW, the lasagna is actually MUCH runnier/gooier than my picture, I confess, I cleaned up the plate to take that pic!
Wednesday, October 05, 2005
Monday, May 09, 2005
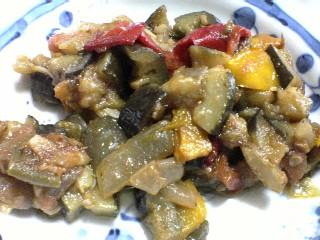
Ratatouille

Garlic and olive oil, to taste
1 large eggplant, cut into cubes (salted, drained, and blotted dry if desired)
2 red peppers, sliced, (I use red and yellow for more color, if I can find them)
3 large tomatoes, chopped
2 zucchini, chopped
1/4 - 1/2 cup shopped Kalamata olives
2 Tb. capers
2 cloves garlic, crushed
Salt and pepper to taste
"Herbes de Provence" (Rosemary, Basil, Marjoram, Savory, Thyme) I use fresh, from my patio herb "garden".
Sauté onion and garlic in olive oil, add the eggplant and fry a few minutes.
Add the peppers, tomatoes and zucchini.
Add olives, capers, garlic and as much of the chopped herbs as you like. Salt and pepper to taste.
Let cook over medium-low heat for 30 minutes, stirring occasionally. Serve hot as a main dish, or cold as a side dish.
Can also be used to stuff into pita bread, roll up in tortillas, or make into a vegetable pot pie.
Sunday, April 03, 2005
Good Gravy! (Who says you need dead cow juices to make it?)
I make AWESOME gravy, if I do say so myself... Awesome VEGAN gravy!!

28 oz. Vegetarian "beef" or vegetable broth (I use "Imagine" Foods in the aseptic box, but you can mix your own from bullion and water or do whatever you want).
1 cup coarsely chopped onion
1/2 cup coarsely chopped fresh mushrooms
1/4 cup coarsely chopped celery
1/4 teaspoon thyme
1/8 to 1/4 teaspoon black pepper
Cooking spray
2 T. all-purpose flour
Combine first 6 ingredients in a medium saucepan.
Bring to a boil;cook 15 minutes or until liquid is reduced to 2 cups. Strain brothmixture through a sieve into a bowl; discard solids.(I know, sounds wasteful - if you want, you can make chunky vegetable gravy and leave them in, in that case, use ike 2 cups of chopped mushrooms).
Coat a medium skillet with cooking spray; place over medium-high heat until hot. Add flour, and cook 2 minutes or until browned,stirring constantly. Transfer flour to a large bowl, and cool completely.
Add 1/4 cup broth mixture to flour; stir well with a whisk. Add remaining broth mixture, stirring well with a whisk.
Pour mixture into skillet; place over medium-high heat.
Bring to a boil; reduce heat, and simmer 3 minutes or until thick, stirring constantly. Serve with mashed potatoes, rice, noodles, veggie burgers, or "meat" loaf.
To make this into Stroganoff:
Make above gravy. Add 2 cups sauteed mushrooms. Stir in 1/2 container Tofutti Sour Cream and heat gently. Serve over rice or noodles. YUM!
Saturday, March 05, 2005
Vegan 'Cheese' Sauce (Don't knock it 'till you try it)
Vegan cheese that tastes "cheesy"... is there such a thing?
Well, in a word, NO!
However, if you're desperate - or curious like we were, there IS this stuff. It's a sauce sorta-thing made with nutritional yeast and stuff. It IS sorta "cheesy" and sorta not. I'm really struggling with the whole cheese thing right now, so it's a tough sell for me, but it's still good and definitely worth a try. My kids'll eat it on crackers or chips, rice or pasta, though they still like good ol' Kraft too, so, I'm continuing to experiment with it...
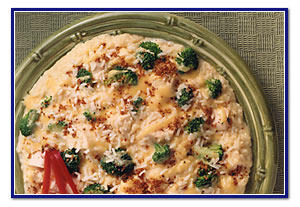
I can verify that it's actually pretty good (it grows on you, give it a chance!) in mac-n-cheese or cheezy broccoli rice (pictures and recipes follow).
1 (15.5oz or about 1 1/2 cups) can Great Northern Beans or Navy Beans rinsed well and drained
6 tablespoons nutritional yeast flakes
3 tablespoons fresh lemon juice
2-3 tablespoon tahini
1/2 teaspoon onion granules
1/2 teaspoon prepared yellow mustard (use the plain old American hot dog mustard)
1/2 teaspoon salt
Instructions:
Place all the ingredients in a blender and process until completely smooth. Transfer to a storage container (preferably glass) and chill thoroughly before serving.
Great on crackers and sandwiches, or in almost any recipe that calls for cheddar cheese. Spread it on buns and serve with vegetarian burgers or add a few spoonfuls to soups or sauces to turn them into cheezy delights.
1.) For Mac-n-'Cheeze':Simply mix the above recipe with some cooked, hot pasta - any shape or variety.
Place in a casserole dish and bake until bubbly and crispy on the edges.
I use whole wheat pasta and add peas, though the girls prefer "no veggies please" in their mac-n-cheeze.
2.) For Cheezy Broccoli Rice:
Mix above sauce with desired amount of cooked rice and some barely cooked broccoli flowers.
(I use white rice for this, for some reason the brown rice always gets very weirdly textured and 'gummy'...)
Posted by
Tofu Mom (AKA Tofu-n-Sprouts)
at
7:07 AM
0
comments
Labels: vegan brocolli and cheese, vegan cheese, vegan macaroni and cheese
Friday, March 04, 2005
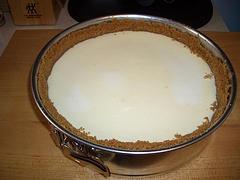
Yummy Vegan Cheesecake!

1 1/2 boxes aseptically packaged (Mori-Nu) package firm silken tofu
1/4 cup maple syrup