Sunday, November 25, 2018

"Dressed Up" Roasted Vegetable Tarts


Happy "Recovering-from-Thanksgiving" Week!

If, like me, you're done with cooking anything complicated and heavy for a while - that's understandable. Keep reading.

I have a super-easy, no-thinking-involved, fast, fresh and flavorful recipe for you.

It'll make quick work of those last ingredients still languishing in your produce drawer and will look like you actually spent time in the kitchen, you know...thinking about dinner again.

And even though this recipe is NOT salad, it just happens to feature my newest favorite discovery: the best bottled dressing I've ever tasted!
So -  go on... take stock of the lonely, leftover produce you bought last week. See what you have to work with. Then prepare to throw together something amazing!

First, a little about the dressing. Have you discovered the awesomeness that is"Dress It Up Dressing"?  You must! I don't often rave over new products, but this stuff is just SO GOOD!
They're a small, woman-owned company with a fabulous line of artisinal salad-dressings, and most of them are vegan.
Their ingredients are simple - things you'd find in your own kitchen, and actually good for you; quality olive oil, vinegar, garlic and mustard, and very little else. No water, no preservatives, no fillers, no weird, gummy textures. I mean, if you’re gonna make a salad, you’re at least attempting sorta-healthy eating, right? Why cover your beautiful salad with preservatives and artificial junk?
I also love that these dressings are super-rich and concentrated, a bottle lasts FOREVER! You'll only need the smallest amount to dress an entire salad, OR make a great dipper for bread or crudités (Tip: it massages into kale to break it down beautifully!)
Even better, they're committed to producing their dressings responsibly and sustainably with locally sourced ingredients. Plus, the artwork on the bottles is darling, I admit it totally caught my eye before I knew anything about the deliciousness inside.
I chose the Apple Cider Vinaigrette for this recipe. I thought it complemented the fall flavors nicely. You can use any vinaigrette you want, but I highly suggest you hop over to their website and grab a couple bottles. You won't regret it, it's lovely stuff!
So, on to the recipe:


"Dressed Up" Roasted Vegetable Tarts
(Makes 2 tarts)


2 Tbs. plant milk
1 package Puff Pastry Sheets (2 sheets) thawed according to package directions
 2 teaspoons chopped garlic
4 Tbsp leftover hummus, pesto or vegan cheesy-type spread
teaspoons Apple Cider Vinaigrette Dress It Up Dressing (or vinaigrette of your choice, you'll need more)

VEGETABLES OF YOUR CHOICE:
(Choose 1 -2 options for each tart)
-- 2 medium-size carrots cut into long, thin strips with a vegetable peeler
-- 6 (aprox)  Brussels sprouts, quartered or sliced thick
-- 1/2 cooked sweet potato
-- 6-8 stalks asparagus, sliced in half lengthwise
-- handful or two of green beans
-- 1/2 a red onion, sliced thin
-- 6 - 8 sliced mushrooms
-- 1/2 a leek, sliced thin
-- red or green bell pepper cut in thin strips
-- 1 med. zucchini, cut in long, thin strips with vegetable peeler
-- pretty much WHATEVER you have in your produce bin!

Garnish: Green onions, roasted nuts, Kalamata olives, dried cranberries, pomegranate seeds, fresh herbs.

Heat the oven to 400°F.

Pastry:
Lightly grease or line a baking sheet with parchment paper.
Put plant milk in small bowl.
Unfold the pastry sheet on the prepared baking sheet. Brush the edges of the pastry with the plant milk. Fold over the edges 1/2 inch on all sides, pressing firmly with a fork to form a rim.
Prick the pastry thoroughly with a fork.
Spread inside of tart pastry with hummus, pesto or cheesy dip.
Sprinkle with garlic.
Refrigerate for 30 minutes while prepping veggies.

Roasted Vegetables:
Place 1/2 vegetables of choice in bowl and toss with 2 teaspoons of dressing.
Because this dressing is so thick and luscious, working it into the veggies with your hands works the best, but do what you like.
Repeat with other vegetables and remaining 2 tsp. dressing.
Place in a single layer on a shallow pan or baking sheet.
Bake the vegetables for 5 - 10 minutes, turning halfway through baking until they're about half-cooked.
Remove from oven. Cool the vegetables slightly.

When vegetables have cooled a few minutes, remove pastry from 'fridge.
Arrange the vegetables however you like, half on each pastry.

Bake for 20 minutes or until the pastry is golden brown.
Sprinkle with garnish of choice, cut in quarters (or smaller for appetizer portions) and serve.

Recipe Note: Parchment paper keeps the pastry from sticking to the baking sheet and also makes for easier cleanup. If you don't have parchment paper, you can spray the baking sheet with cooking spray instead. However, cooking spray may cause the bottoms of the pastries to brown more quickly, so begin checking for doneness 5 minutes early.

Full Disclosure: The products were provided to me for free to review, this did not influence my opinions of this product.

Saturday, October 27, 2018

Kumquat and Fresh Turmeric Cake

Not long ago, I was sent a fantastic box of unique produce items from the fabulous people at Frieda's Produce.
Called an "Inspiration Box", it was packed with colorful, unique produce I cannot find here in my corner of the wild woods... Dragon Fruit, Stokes Purple Sweet Potatoes, Fresh Turmeric Root and Kumquats. Has anyone cooked with any of the above lately?


While I'm familiar with all these lovely items, I've only had a couple in my kitchen before. So this box definitely nudged me out of my comfort zone and got me trying new recipes and products!


Suprisingly, I was most stumped by the bag of cute little kumquats! These little citrus fruits are about the size of a grape, and are completely edible, skin and all. Apparently they're super-nutritious too, full of "...antioxidant, anti-inflammatory and cholesterol-lowering properties"
Whatever. They're delicious and you should try them. 

I've eaten them on a number of occasions, but never actually had enough of them to consider using in a recipe. So, I started randomly Googling, and ran across a number of drinks, marmalades, and finally a couple recipes for kumquat cake!
If you've followed my blog or Instagram for even a minute, you know I really am NOT a baker. But since this box was all about trying new things, I decided to try baking. ...A CAKE! (I know, right?)


There are recipes all over the internet for blending up a whole orange, skin and all, and using it in a cake. I figured it'd be easy enough to do that with kumquats, right? But I couldn't find any whole-orange-cake recipes that were vegan, (and, no, I'm not good enough with the science of vegan baking yet, to attempt to vegan-ize a cake recipe.) OK, so how about just a vegan orange-flavored cake?

I finally found one that was close. Maybe. 
The recipe I settled on (this lovely-sounding Orange-Cream Turmeric Cake from "Namely Marley") didn't originally call for kumquats, but I was intrigued because it DID call for turmeric, another ingredient in my box, so I figured I'd try and make it work. (OK, so it actually called for powdered turmeric, but I decided I was going to use fresh grated turmeric root! Sounds completely reasonable for a non-baker, right?)

Annnnnnnd, I don't own a flat cake pan, just this fancy, decorative, Bundt pan, so I knew I'd need to double the recipe as well. (As you seasoned bakers will note, I'm already doing enough to REALLY ruin this recipe.)
Nevertheless, I mixed and measured and stirred and tasted (it's a vegan recipe, it's OK to taste the batter, right?) and popped it in the oven with fingers crossed...
And, it turned out.
Whaaat?? I was just as surprised as you all are!
Yes, I had to bake it a good bit longer, in fact, I made so many adjustments it's basically an entirely new recipe, (which I'm posting below). But I did want to give credit to the original inspiration.
This is SUCH a flavorful cake! The fresh turmeric is earthy and spicy, like a cross between carrot and ginger. The kumquats add a super zesty citrus kick that's stronger than an orange but not as sweet. The flavors are intense at first (in a good way) but mellow beautifully and deliciously overnight. If you should find yourself with some random kumquats and fresh turmeric root, be sure and give this a try! 


Kumquat and Fresh Turmeric Bundt Cake

1 cup coconut oil, softened
1 1/4 cup sugar
Enough kumquats, (aprox two large handfuls?) blended up, to make 1 1/2 cups of puree
1-inch pc. fresh turmeric root, finely grated (or blend with kumquats above)
4 tablespoons ground flax seeds
4 tablespoons corn starch
1 cup non-dairy milk of your preference
2 teaspoon apple cider vinegar
1/2 teaspoon vanilla (or orange, for even MORE flavor!) extract
3 cups all-purpose flour
2 1/2 teaspoon baking powder
1 1/2 teaspoon baking soda
½ teaspoon salt

Heat oven to 350F.
Spray a round, 6-cup "Bundt" type ring baking pan with vegetable spray. Flour pan well.
In the bowl of a food processor or blender, blend about two heaping handfuls of  washed and dried kumquats into a moderately smooth puree. Add the turmeric root and blend some more, until turmeric is blended into mixture.
Measure out 1 1/2 cups of puree.
Use an electric mixer (stand mixer or handheld) to combine the coconut oil and sugar.
Beat for a minute or two until the mixture is light and fluffy.
Add the kumquat puree, ground flax seeds, corn starch, soy milk, extract and apple cider vinegar.
On medium high, beat again until combined and fluffy.
In a separate bowl combine the flour, baking powder, baking soda and salt.
Pour the flour mixture into the sugar-kumquat mixture.
Using the mixer, beat on low until combined, using a spoon to stir down the sides.
Pour the cake batter into the prepared baking pan. (Depending on size of pan, according to some testers, there may be too much batter! Only fill your an 3/4 full. If there is extra batter, make a couple cupcakes or something!)
Bake for 45 - 55 minutes, until a toothpick inserted into the center of the cake comes out clean.
When it's ready, remove the cake from the oven and cool on wire rack.
Remove from pan after it's cooled for 1/2 hr or so.
Set aside to cool completely. The recipe that inspired me used a cream cheese type frosting, but I'm not a big frosting fan, so I simply drizzled my cake with a orange-juice-powdered-sugar drizzle (no recipe, just mix however you want).

Let cool on wire rack, and enjoy! The earthy turmeric and tangy kumquat flavors are really intense at first, but mellow after a day or so. Lovely with a cup of chai tea!!

Monday, October 01, 2018

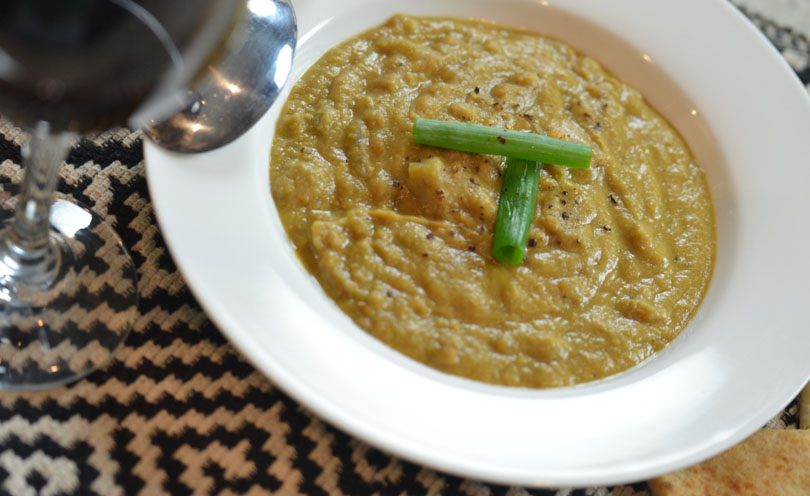
Creamy Italian Chickpea Soup

Hello again!

Posting a quick recipe because it’s an often-requested oldie, and a huge cool-weather favorite from back in my "always-rushing-carpool-driving-PTA-volunteering-frazzled-soccer-mom" days....
We did a lot of Crockpot soups!!

Have you tried cooking beans or chickpeas from dry?
They cook up delicious and velvety, completely different from canned. And, (yes, you've likely heard it before, but...) it's SO easy (especially in an InstaPot or Crockpot) and ridiculously cheap.
I still use a Crockpot for this recipe. I’m old school that way.
Just throw stuff in, turn it on, and walk away.
Sorry-not-sorry there’s no InstaPot instructions.
Yes! I have one, but just haven’t bothered converting this recipe.
I'm sure those of you who are die-hard fans can figure it out.
Another reason to love this recipe? It requires no soaking or anything remotely complicated!!

This soup does NOT look like much, but the texture is magic. Wonderfully rich, satisfying and creamy.
Perfect "comfort food" on drizzly, damp days. (Which would be October to May around here!)

Add some greens while heating through at the end, if you want. I do that, now that I'm cooking for two of us, but back in the day, my kids preferred "plain" soup with sourdough croutons (that's OK, you blend the soup and end up hiding all sorts of veggies in it, anyway)!

Creamy Italian Chickpea Soup

 Ingredients:
7 cups of your fave vegetable broth (make your own, or jazz up canned or boxed broth a little, good-tasting broth = good soup!)
1 pound dried garbanzos/chickpeas
1 carrot or sweet potato, diced (no need to peel unless you want)
1 onion, peeled and diced
2 stalks celery, chopped fine
*optional: 2 cups chopped any other veggies of your choice - turnips, leeks, squash, potatoes, mushrooms, whatever is in the 'fridge
3-5 cloves garlic, crushed
1 Tbsp lemon juice or 1 tsp lemon pepper seasoning
1 tsp dried oregano
1 tsp dried basil
1/2 package tempeh “bacon” of your choice, chopped fine
 2 Tb olive oil
Aprox 3 more cups broth, water, plant milk or tomato juice to dilute soup
salt and pepper

To Serve:
Cracked Black Pepper
Extra Virgin Olive Oil
Croutons or Scallions if desired

Directions:
Place the water, chickpeas, carrot, onion, clery *optional veggies if desired, garlic, lemon juice, oregano and basil in a 4 quart slow cooker/Crockpot. (Or in a stock pot on the stove)
Cover and cook in Crockpot on high heat for 4 hours, or low heat for 8 to 9 hours, or until chickpeas are tender. (Or a low simmer on stovetop for 4+ hours, adding water as needed until chickpeas are soft)

After chickpeas have cooked, taste for salt, if the broth was salted you won't need it, otherwise add some now, then turn off and set aside.
(At this point you can refrigerate the chickpeas until ready to make soup - just bring to temperature in a pan on the stove or in crockpot again when ready).
So... when you're ready to finish your soup, in a medium skillet, heat the oil and add the tempeh "bacon".
Cook until the tempeh pieces are lightly browned and crispy, set aside.
Remove about 2 cups of the chickpea/veggie mixture and set aside.
Taste chickpea/veggie mixture in Crockpot and season with more salt and pepper as needed.
Then purée the chickpeas/veggies from Crockpot until they’re thick and smooth, using a high powered blender or with immersion blender.
If the chickpeas have sat a while and cooled, they've likely thickened up and you'll need to add additional water, plant milk, broth or tomato juice if you prefer some tomato in your soup, to get the thickness you prefer for soup.
I use an immersion blender to blend the chickpeas right in the crock pot.
If  using a blender, make sure the chickpeas have cooled some, and do this in batches (so as to not have a heat and steam explosion).
Heat blended soup to serving temperature, stir in the whole chickpeas you had set aside earlier - let soup come to simmer. (Either in crockpot or you can heat in a pan on the stove at this point if you want...)
If desired, add several handfuls chopped spinach, baby arugula or chard at this point. Simmer a minute until just cooked.

Just before serving, top with tempeh "bacon" bits.
Serve topped with some cracked black pepper, croutons, scallions or a drizzle of extra virgin olive oil, if you want to be all authentic. And a glass of wine if you're also an always-rushing-carpool-driving-PTA-volunteering-frazzled-soccer-mom!!

Friday, August 03, 2018

A little bit about Jackfruit.

Red Chile Jackfruit Taco Salad
 So a few weeks ago, I tried using Instagram Stories for the first time, in an amateurish (or nightmarish?) attempt to show all three of my followers how I "do" jackfruit.
I was genuinely surprised at the feedback, as it seems there are tons of jackfruit recipes out there, but not a lot of photo tutorials on exactly how to get this weird fruit-not-fruit stuff into the delicious shreddy-plant-based-meat texture that you want.


So I'm posting those below-average  photos here, on my sadly neglected blog, with a few more notes, in hopes that they'll help a few more people discover how fun and creative you can get with this stuff. Follow along. I tend to get wordy.

 First of all, lets start with this: You aren't going to want a giant, pokey, smelly, sticky, fresh jackfruit for this project. They ARE delicious, do try one if you get the chance, but just know that whole, fresh jackfruit can be a HUGE mess to deal with. They're giant, bulky things with sharp. stabby spines, and the sap/latex inside is literally the consistency of rubber cement. Unless you're familiar with jackfruit and they grow in your back yard, leave this part to the professionals. You'll never get the sticky off your hands, counters, cutting boards, knives, hair, pets, shoes... not that I would know.
If you're wanting to cook with jackfruit, the best product is very simple, but you want to get it right: CANNED, YOUNG/GREEN JACKFRUIT IN WATER (OR BRINE). Accept no substitutes.
Not the fresh fruit, not ripe canned jackfruit, not pre-flavored, prepared, plastic packaged jackfruit. Those all have a purpose, but not for this "tutorial". Not if you're wanting to cook it down into a nicely flavored, shredded BBQ-sandwich or taco filling type of thing. You're going to have to get the canned stuff.
Canned young, green jackfruit shouldn't be too hard to find any more. It's available, (and shouldn't be very expensive), at Asian markets, Trader Joes, some Whole Foods, some larger Walmarts, and on Amazon.com. Plan on about 1 can per person, it cooks down quite a bit. In my photos, I'm using two cans of jackfruit. Most brands are about the same quality, I tend to use the "Dragonfly" brand when I can find it, it seems just a but firmer and less mushy, but I really think they're all pretty similar.
So, now you have your jackfruit. Open those cans. Drain them. It should look like pale chunks of dense pineapple.

Put the chunks in a colander or sieve and rinse under running water for a minute or two to get rid of the briney, "can" taste that some people complain about.
If the jackfruit chunks have a hard "core" (like pineapple does) you'll want to cut that off and chop it a bit, so everything cooks evenly.

Add the cut up core pieces back to the jackfruit.  Rinse again. (At this point jackfruit absorbs the flavor of everything, even your wooden cutting board).
Now, take all your jackfruit bits and pieces, and dump it into a dish towel. Wrap it up, twist it and wring the heck out of it.  Wring it a couple times until you've pressed out as much liquid as you possibly can.


Undo the dish towel over a cookie sheet. The jackfruit should be damp but not mushy, and will look somewhat "stringy". Go ahead and shred it up a little more with your hands if you want. It will break up a bit during cooking, your pieces don't need to be real uniform.


You'll probably notice some almond-sized seeds. Go ahead and pick those out if you want. They're soft and completely edible but personally I just think they look weird in the finished product. Do what you want.

Preheat your oven. Your choice here: I originally said 375° in my photos, that'll cook things faster, but since then, I've decided I prefer about 300°, as you have more control over the finished product if it's done at a lower temp. 
Now, spread your jackfruit into an even layer on your baking sheet. You don't want more than two cans per baking sheet so if you're doing a bigger batch, use more sheets.
I use a "Silpat" baking mat because once the sauce is added, the jackfruit will become sticky. Baking parchment also works fine here.
Sprinkle with about 1 tsp. olive oil per can of jackfruit. Work the oil into the jackfruit with your hands. This will shred it more, too. 
If you want any DRY seasonings or spices, (cayenne, salt, pepper, smoked salt, etc) add them now, as the oil will help them stick.
Bake your naked jackfruit for about 30 - 50 minutes, stirring at least once, until it's just starting to get a bit dried out.

**You can remove the jackfruit at this point and store in fridge a few days until ready to finish, OR even freeze it for later.

  Once the jackfruit has started to show signs of drying out a bit, remove from oven and pour your preferred sauce over. This is where you can get creative! Anything goes! BBQ, teriyaki, sweet-and-sour, taco sauce, adobo/chipotle/red chile, curry, Korean BBQ, honey garlic, Hawaiian, hot and spicy, buffalo, whatever! Plan on about 1/4 cup per can of jackfruit. Mix in as well as possible (jackfruit and pan will be hot). 
Adding the sauce after drying the jackfruit out a bit seems like a lot of extra time and bother, but it's worth it - it's a key step in having the flavors absorb all through.
If you've frozen the partially prepared jackfruit, take it straight from the freezer, put on baking sheet and continue with the sauce step.

Continue baking the jackfruit for another 20 - 60 minutes (depending on what temp you're using and the desired texture of the finished product). Remove from oven and stir every 20 minutes or so. 
 Your recipe will determine how long you continue to roast the jackfruit. If you're wanting a dry, crumbly jackfruit, like for a taco-salad filling, then go longer. If you're wanting saucy "pulled-pork-style" BBQ for sandwiches, then less time is better. Nachos or burrito filling might need something in between. If you're wanting some "burnt-end" bits, let it overcook a bit and then add back more moisture with more sauce.

When the jackfruit is done to your liking, remove from oven, stir again, and let cool a few minutes.

Serve and enjoy!
Like tofu, green jackfruit is a blank slate and will absorb any flavor you cook it with. Get creative and have fun!

Friday, November 10, 2017

White-Bean, Green-Chile Chili

Once Upon A Time...
There was a chili cook-off.
And I won.
The end.

YES!
I admit I haven't been blogging much lately, and here's the thing:
I still love creating new things and cooking vegan awesomeness for people, but often I feel like I've run out of interesting or unique recipes to share. The vegan blogging world has grown exponentially since I started scratching out recipes that my kids liked, and posting tacky little photos to go with them. My kids are grown, my kitchen has downsized, and my recipes are usually just for ME. But every now and then I DO get inspired, and feel I have something worth sharing, so keep checking back if you're the one person still following along....

So. Back to my story:
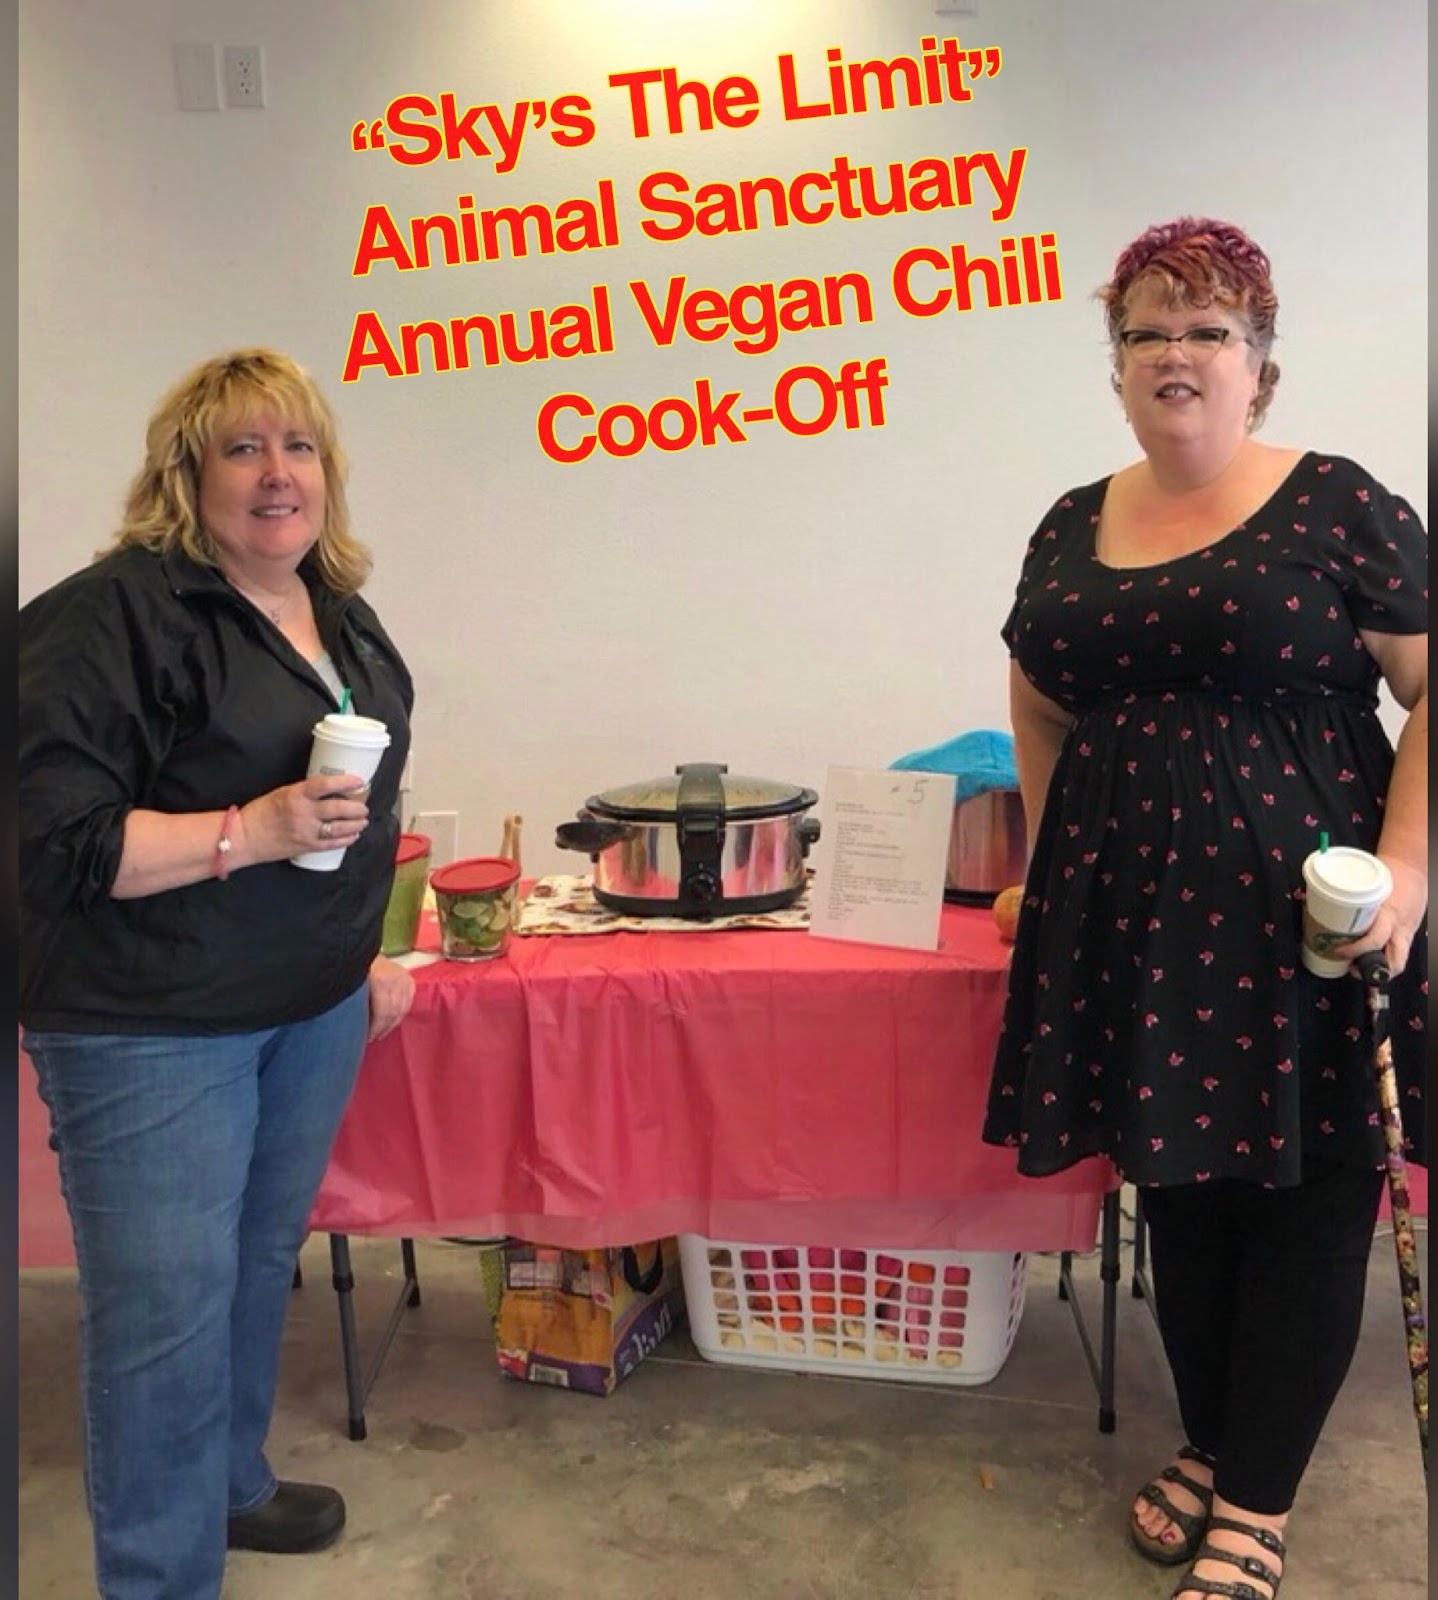
"Sky's The Limit" is a wonderful local animal sanctuary (mostly chickens!) and when they announced they were having a fund-raiser vegan chili cook-off, I decided to improve on my (2nd-Place, 6 years ago) winning chili recipe and compete again...

 Since I struggle with pretty crazy arthritis in my hands, my knife grip isn't that great, so I enlisted the help of my best-best friend Sherrill, to help with the slicing and dicing and general goofing off in the kitchen... She was also a great taste-tester because, as most of you know, I don't even LIKE chili!!

Well, we had a blast, because cooking with your best friend is always awesome and and I think we cooked up the BEST batch of chili EVER!
To make a long story short, we won "Best Overall Chili" and "Most Unique Chili" at the contest.
And, winning or not, it was SUCH a fun event and I hope they continue to hold this contest every year!
But, should you want to re-create the chili, here you go!
My basic "winning" recipe NOT a secret; but it feels long and complicated when I write it all down, so good luck with all these steps! And just know, I don't follow recipes well, and do a lot of taste adjustments, so if it doesn't win you any prizes, it's not my fault.


WHITE-BEAN, GREEN-CHILE CHILI

  • 3 cups dry white beans of your choice.
I used ½ small white beans and ½ Mayacoba (or “Peruano” or Canary) beans (found in the Mexican Food Section)

COOK THE BEANS AS FOLLOWS: (Credit for this bean cooking/flavor method goes to JL Fields and her book Vegan Pressure Cooking, which you really should have in your library):

  • 3 cups dry beans soaked overnight
  • 1 Tbsp oil
  • 2 cups chopped onion
  • 1 tsp maple syrup
  • 1 cup chopped mushrooms
  • 2 tsp smoked paprika
  • 6 cups water (or part broth)
  • 4 tsp red miso
  • 1 tsp soy sauce

Rinse and drain the beans. 
In an uncovered pressure cooker, heat oil, then cook onion and maple syrup for 10 minutes until well browned but not burned. Stir frequently – if they start to stick add a bit of water – you want them caramelized


and soft, but not burned. 
When onions are done, add all remaining ingredients except soy sauce, stir and cover pressure cooker.
Bring to high pressure, cook for 10 min and then do a natural release.
Beans should mash between two fingers or on your tongue. If not soft enough, simmer a while until they are.

Stir and taste beans, if too salty, rinse JUST A LITTLE. 
If too bland, add soy sauce, bullion powder or broth to taste.
THEN:
Set aside 1 cup cooked beans with some liquid.
Drain remaining (aprox) 4+ cups beans very well.

____________________________________________
 
Rest of ingredients - - 

  • 2 cups fresh or frozen white corn kernels
  • 4 cups good vegetarian chicken (or vegetable) broth
*I use powdered “Seitenbacher” brand bullion powder + water, and and mix it slightly less than full strength to keep salt levels down
  • 1 13 oz. container BUENO® Autumn Roast Frozen Hatch New Mexico Green Chiles (available in New Mexico and at some Whole Foods).
(OR equivalent amount fresh roasted, peeled and chopped poblano or Hatch peppers; just don’t use canned green chiles!!)
  • 1 bay leaf
  • 1 tsp. dried, crushed oregano
  • 1 tsp cumin
  • 2 7-oz. packages Beyond Meat® Chick'n Strips
  • 1 red bell pepper, chopped small
  • 4 cloves garlic, peeled and minced
  • ½ white onion, finely diced
  • 2 jalapeño peppers, minced finely
  • 1 habanero pepper, minced VERY fine (ONLY if you want more heat!!)
Drain the home-cooked beans that you made above.
In crock pot or in a heavy pot on the stove, combine the 4 cups drained beans, green chile (and liquid that’s with it), corn and broth. 
The secret here is to get a broth you REALLY like, it'll make or break the end resulting flavor of your chili.
Add bay leaf and oregano and bring to simmer. 
Let simmer while preparing Beyond Meat® "Chick'n".

To prepare Beyond Meat® Chick'n:
Coarsely chop (cut strips aprox. In quarters) the strips and sautee in a bit of oil just until cooked and firmed up. Set aside, let cool a bit and then "shred" randomly with your hands or two forks. This will take a while!
Spread shredded-crumbled chick'n out on a cookie sheet and place in a low oven (250°F) for about ten - 15 min or until slightly "dried out" just a bit (NOT crispy dry!) and starting to get a bit of light toasty color. This step helps the chick'n hold it's texture in the chili and not disintegrate into mushiness.
Add chick'n to simmering beans.
Taste and add another cup of broth or water (depending on how salty it is) if too thick.
In a frying pan, add oil and then sauté bell pepper, garlic, onions, and jalapeño (and as much of the habanero you want, if using) over medium heat until soft.
When vegetables are soft, add to bean mixture and continue to simmer on medium-low for about an hour, (or longer in crockpot) checking often to make sure it doesn't stick – add water or broth if needed.

Take the remaining cup of beans that you set aside earlier and puree in VitaMix (or other blender) until very smooth, and a consistency like sour-cream (add broth as needed). Add creamy blended beans to the cooking chili mixture.
Taste and adjust flavors!
I adjust to my liking with a tiny bit of salt, pepper, lime juice, hot sauce, tamari, and/or miso. Use whatever you think it needs here.
Remove bay leaf.
Serve now, or, (PRO TIP HERE) it’s much better better if cooled overnight and reheated the next day!!
Garnish with a spoonful of Cilantro Pesto…

 
Jalapeño-Cilantro Pesto
  • 1 bunch fresh cilantro, rinsed well
  • 3 jalapeños as needed (taste them, you want SOME "heat" but adjust to your tastes)
  • juice from five limes
  • 1/4 cup raw pumpkin seed
  • 1/4 cup raw cashews
  • 2 Tbs olive oil
  • 2 cloves garlic
If you have time, soak the cashews and pumpkin seeds several hours or over night.
Then, blend everything in your food processor until smooth (though still slightly "grainy" is fine). Drizzle/dollop a couple teaspoons on each bowl of Chili.

Wednesday, March 29, 2017

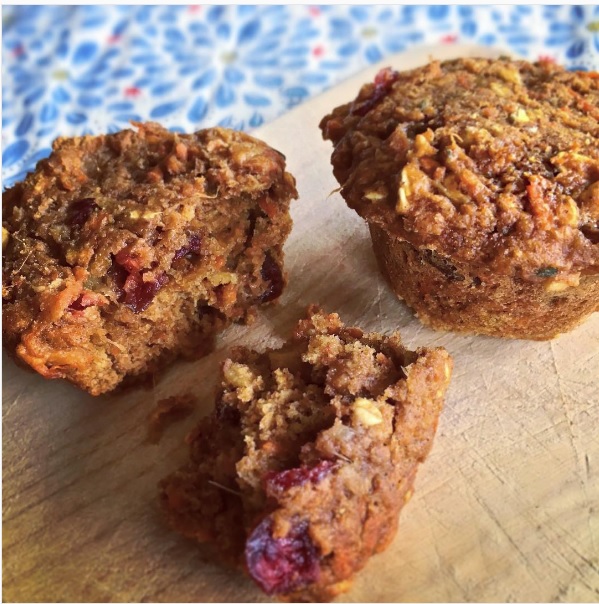
Vegan Whole Wheat Carrot-Cake Muffins

Wooops! I'm back. Again.
Hello!
Don't mind me and my shameful lack-of-blogging... No excuses.
And it's a bummer that I haven't kept up, because I have SUCH a backlog of awesome recipes to share!!

Without further excuses or rambling though, let me just jump in with this recipe because I'm super-excited about it.

As I may have mentioned, I am NOT a breakfast-eater, but I know I SHOULD be, so I started looking for a muffin or bar recipe - something marginally healthy that I could grab and and eat on the run. Additionally I wanted it sort-of spicy and dense and "carrot-cake" like.

I didn't have a lot of luck however, for several reasons; First of all, I LOATHE bananas and it seems every vegan muffin recipe out there uses bananas.
Now, I know I can substitute applesauce, pumpkin puree or other things for the bananas, but problem number two... I am NOT a baker. So I was looking for a recipe I could make exactly as written, at least the first time I attempted.
Additionally? I am not gluten-free and (apologies to all of you who are) since my baking skills are minimal, I didn't want to attempt something with ingredients I'd never worked with before.

Finally, after finding about five recipes that seemed *almost* close enough, I chickened-out on tackling them myself (we vegans can "chicken"-out, right? That's OK, isn't it?) and I forwarded all the recipes to my long-suffering boyfriend, along with my criteria, and said "HELP ME!".
And he did, of course, because he's awesome that way! He's also a great baker and has infinitely more patience for measuring and weighing and kitchen science voodoo than I do. And he knew I hated bananas!

So he threw the recipes out, did a little mixing and stirring and measuring and tweaking - and MAGIC! Big, beautiful, dense, spicy, carrot-y muffins with NO oil, very little (or no) sugar, and lots of awesomeness! Long story short - this recipe is really his. But he said I could publish it here on my blog. So I am.
Because I think everyone should have access to awesome carrot-cake-inspired breakfast muffins!

There are *optional nuts, seeds and sugar you can add, if you prefer, it's up to you. Either way, these are super-crazy-healthy good-for-you (I know, I don't post a lot in the "wow-so-healthy" category, but these are really healthy and really good!)

One note, this recipe makes 24 muffins. Halve the recipe if you want.
There are 4 people in my house though, and these disappear quickly!!! They'll keep for at least 4 days on the counter (maybe longer? We always eat them!).
I also keep some in the freezer. Either way, they're now a breakfast staple, everyone grabs a couple, they defrost quickly and are quite filling. They're very dense and moist and even though they're oil-free, they don't dry out much. Personally I sorta like them after a few days when they've dried just a slight amount on the outside, but the interior is still soft and cake-y.

Vegan, Whole-Wheat,
 Carrot-Cake Muffins
Ingredients:

- Dry
3 cups whole wheat flour
2 tsp baking powder
2 tsp baking soda
1 1/2 cups old fashioned oatmeal
2 Tablespoons ground flax
1 Tablespoon cinnamon
1 tsp ground ginger
1 tsp nutmeg
1 Tablespoon vanilla
1 teaspoon salt

- Wet
3 medium-to-large carrots, shredded
1 1/2-inch chunk of ginger root (or less if you aren't a ginger fan), finely shredded
2 cups unsweetened (or not) applesauce
2 8 oz cans of unsweetened crushed pineapple, NOT drained
1 cup raisins
*1/2 - 1 cup pumpkin seeds or chopped nuts
*1/2 cup dried cranberries, or other finely chopped, dried fruit of choice
*3/4 cup brown sugar packed (optional, use less, or none, if you want)

Directions:
Preheat oven to 350F.
Put muffin papers in standard-size muffin pan, or spray with cooking spray.
 

Get out two bowls: one for wet ingredients and one for the dry. 
Combine dry ingredients in one bowl and whisk.
Shred carrots and ginger in a food processor.
Combine carrots and ginger with other wet ingredients in another bowl and mix well. 
Add dry ingredients to wet and mix until ingredients are all wet, but don’t overmix. The batter is pretty thick
.

Fill each muffin cup almost full with the batter (it doesn't rise much). 
Bake for about 35 minutes, or until muffins are fully cooked through the center. (Check with a toothpick, they might be moist but shouldn't be gooey).

Let cool for about 15 min and then remove from pan to wire rack.
Store loosely covered at room temp. or freeze in individual ziploc baggies.

Thursday, September 22, 2016

"Pulled-Pork-Style" Shredded BBQ Mushroom Sandwiches

This is an oldie, but a goodie; one of my recipes that people ask for over and over...
I realize BBQ-saucy, shredded "pulled-pork-style" jackfruit is the darling of the vegan recipe world right now (and believe me, I LOVE me some jackfruit!!) but I much prefer this style sandwich with shredded .....mushrooms.
Yep. Mushrooms.

I use gigantic King Oyster Mushrooms and shred them on a mandoline slicer. (A coarse food processor shredding blade also works, you want long strands, not finely minced mushroom mush!)

This really won't work so well with other mushrooms, you're going to need the firm, but easy-to-shred, texture of the giant King Oysters.
If you've never worked with them, they're great big things - roughly the size and shape of a chicken drumstick, usually found in your local Asian Market or better-stocked grocery stores.
Seriously? Prep takes a little while, (i.e., lots of wordy directions), but follow along, I promise, it's the EASIEST way to impress non-vegans ever!

(And, they're are a great source of protein, vitamin B6, folate, iron, magnesium, zinc, dietary fiber, riboflavin, phosphorus, potassium, and copper too, in case that part's important to you!)

And did I mention, they're ridiculously CHEAP!

When it's all cooked up, the texture is a little softer than chicken, but seriously, who's comparing things that closely? Even the DIE-HARD meat-lovers I know will happily gobble up an entire pan full of these!
The umami caramelized-mushroom and BBQ flavor and hearty texture ends up looking and tasting deliciously shreddy-meaty-BBQ-y.

"Pulled" Mushroom BBQ Sandwiches
4 King Oyster Mushrooms, (they're mostly a big stem - the size of a large chicken drumstick or larger (sorry for the comparison but that's what they remind me of!!)
2 Tb. vegan margarine
1/2 tsp. salt
1/2 large sweet onion, very thinly sliced
1 1/2 cups favorite BBQ sauce
1/2 cup water
Finely shred the mushrooms using the finest shred, matchstick or julienne blade on your Mandoline Slicer; You want toothpick-thin slices.
If you have a food processor with a feed chute and shredder blade, you can use that too.
Melt margarine in a large skillet, add shredded mushrooms, onions and salt; Saute on med-high (as high as you're comfortable with) until the mushroom and onion get bits or brown on them. Add a bit more margarine if needed so things don't burn.
Reduce heat, and cook, COVERED over medium, stirring occasionally, until mushrooms release liquid and become juicy, about 10 - 15 minutes.
Continue to simmer, covered, until vegetables are soft and tender, about another 10 minutes. (Add a couple Tbsp. water if it isn't still a bit "juicy").
Stir in BBQ sauce and water, remove cover and simmer another 10 minutes or as long as needed to evaporate sauce a bit.
When sauce has thickened, turn heat to high and stir frequently/watch closely until extra moisture evaporates and mixture becomes thick and sticky.
Allow to "stick" and caramelize a bit, but scrape pan to prevent mixture from actually burning.
Serve over hot sourdough toast, burger buns (or try with a hearty, non-sweet, rustic raisin bread like I did.) Coleslaw is a nice touch here too!

Monday, April 25, 2016

"Fried-Chicken-Style" Vegan Mushroom Drumsticks


Maitake Mushrooms
I'm on a mushroom kick lately - all shapes and sizes are readily available at our local Farmer's market, Tacoma Food Co-op and many Asian markets (when I venture into the city).

Lately, I've seen beautiful pictures where fancy vegan chefs take mushrooms and make "fried-chicken-style" mushrooms, or crispy brown "mushroom drumsticks" - making us all drool on Instagram, Pinterest and Twitter.
And I thought... "How hard can it be?"
Well. Let me tell you. It's NOT very difficult at all. (As long as you don't mind frying stuff. In oil. Hot oil.)

If you can get your hands on a bunch of mushrooms like hen-of-the-woods or small clumps of oyster mushrooms, you break them apart into pieces and batter and fry in little 'drumsticks' of mushroom deliciousness.
The results are off-the-chart (fried things + mushrooms. What's NOT to love?).
Crispy coated, with a look and 'bite' that is very much like chicken while still keeping the umami mushroom taste -  very satisfyingly "meat-y" for the omnivores in the family too.This is NOT diet food, gluten free, low sodium or oil free. (Surely you've read my blog enough to know those just aren't my focus.)

I've only made these about four times so if my directions are a bit vague, it's because the recipe is still in it's beta version. Feel free to let me know how yours turn out.
I brought leftovers to work and my co-workers genuinely FREAKED out, thinking I had jumped WAY off the vegan boat!!

"Fried-Chicken" Style 
Mushroom Drumsticks


2 lbs. mushrooms that grow in "clumps", like oyster, trumpet, maitake or hen-of-the-woods 
Dry Mix 
Mix together the following:
1 1/2 cups flour
2 Tbsp cornstarch
1/2 tsp baking powder
1 tsp "chicken-type flavor" vegan broth/bullion powder (I used Massel granules, but use whatever you have, or just use 3/4 tsp Seasoning salt)
1/2 tsp sage
1 tsp onion powder
1 tsp black pepper
1 tsp paprika 
Wet Mix
Whiz in food processor or blender until smooth and about the consistency of ranch dressing, add a little water if needed:
1/4 cup vegan mayo (your choice, any brand)
1/2 cup unsweetened plant milk
1/4 cup water
2 tsp flax meal
1 tsp lemon juice
several dashes hot sauce 
Method 
Put Wet Mix in a deep bowl, and Dry Mix in a pie plate or flat dish.
Brush any debris from mushrooms, wipe with damp paper towel if needed.
Cut or break apart lengthwise, keeping part attached to  main stem, into small, roughly "drumstick" type pieces. (If smaller pieces fall off that's OK, they can be fried up too!).
Heat 1 inch of oil to med high (I prefer refined-flavorless coconut oil but canola oil is just fine) in a small cast iron skillet. (Any size is fine but a smaller pan uses less oil).
Dip mushroom pieces into Wet Mix until well coated, let excess drip off.
Then dredge in Dry Mix, patting a bit to get it to stick if needed.
Lay several pieces carefully in hot oil. Don't crowd pan. Working in batches, fry the mushrooms in the hot oil for about 2 to 3 minutes each side, turning occasionally with tongs, until the surfaces are golden brown. (If they brown too fast, turn heat down a little).
Remove immediately from oil and set on paper towels to drain.
Place in low oven to keep warm.
Continue with the rest of the pieces.

Serve with vegan ranch or hot sauce to dip -  or make a full on "chicken dinner" with veggies, mashed potatoes and gravy!!


Monday, April 04, 2016

Mushroom "Clam Chowder"

So, supposedly it's "spring" here in the blustery Pacific Northwest, but no matter what the calendar says, it's still soup weather. And tonight, in an inspired fit of freezer-organizing, I decided to make my vegan clam chowder to use up a package of sauteed-and-frozen mushrooms I'd saved from last fall, AND make a dent in the stash of potatoes I seem to have stockpiled in my garage.

Tofu-Mom's Chowdah
(I call it that only to irritate my offspring, they tell me my accent is terrible - and it is. 
The soup's good though!!)

I wrote this down one night as I was making the recipe up, so the directions might be a bit scattered...
Follow along and it makes sense though.

1 Tbsp. margarine
1 cup chopped king oyster mushrooms (or regular white mushrooms are fine, the oyster mushrooms just have a lighter color and GREAT texture for this, and they're super cheap at Asian markets)
1 cup halved and sliced leeks
1/2 cup chopped celery
1/4 chopped carrots
1 tsp powdered dulse or kelp (a kind of seaweed - or use crumbled Nori)
1 tsp. smoked salt
Saute the above in a stock-pot until vegetables are tender, stirring frequently. Cover to steam a bit as they cook if you want, they'll cook faster.
It'll smell pretty smoky and fishy for a bit - not to fear, the finished soup is much milder!

Add these next 4 ingredients and cook at a low boil until potatoes are pretty soft - about 15+ min.

2 tsp Old Bay seasoning
1 bay leaf
3+ cups vegetable broth (I usually do 1/2 broth and 1/2 water)
6 med red or white or Yukon Gold potatoes, cut into smallish chunks,

When potatoes are very soft, remove bay leaf, mash everything a bit with a potato masher, so there's some chunks still but the potatoes are making it a bit creamy.

Stir in these next 3 ingredients and heat on low, stirring frequently, until heated thru. About 7 - 10 minutes.

1 cup soymilk
1 cup coconut milk (the kind in a can)
1/2 cup vegan cream cheese (yes, cream cheese, it works, trust me)
Season to taste.
I add a splash of Tabasco, a grind of black pepper or some fresh chopped parsley or dill.
(My kids get picky about too many green flecks floating around which is why you'll see the bowl pictured is pretty free of green...).
Serve with lots of saltine crackers.
We tend to LOVE those little round "oyster crackers".

Enjoy, and have a GREAT weekend!!

Wednesday, March 30, 2016

Kale Salad With Thai Peanut Dressing

Kale seems to be the ubiquitous "vegan" ingredient found in almost everything these days. Chips, crackers, soup, smoothies. I have to admit I'm NOT a green smoothie fan but I DO love kale in salads and many other recipies!
 Kale is one of the items that comes back in my garden every spring, and I can't wait until I have enough leaves to make my first "garden" meal.

This combo is my go-to when I'm craving a super-flavorful salad or just some raw, dark greens. I love the way the curry and peanut flavors blend and mellow the bite of the kale.
This is a great recipe to get kids helping in the kitchen too, "massaging" the kale leaves is completely messy and fun!

Kale Salad with Thai-Peanut Dressing

Dressing:
1/3 cup peanut butter
2 Tbsp. apple cider vinegar
2 Tbsp. soy sauce
1 inch piece ginger, shredded
2 cloves of garlic, minced
1/4 cup fresh lime juice
1 Tbsp. brown sugar, agave nectar or honey
1 tsp. Thai curry paste* or more to taste
1/4 tsp. cayenne or to taste
pinch of salt, or to taste

Salad:
1 large bunch kale or as much as you want for the amount of dressing (I prefer the Tuscan kale also know as black, dinosaur, or lacinato)
1 carrot finely shredded
2 Tbsp chopped fresh cilantro
1 - 2 cups finely shredded purple cabbage
1 bunch green onions, sliced
sesame seeds or crushed peanuts for garnish

To make the dressing:
Whiz first nine ingredients in food processor and taste. The dressing will be thick. Add a Tablespoon or two of water if needed to make it blend smooth. Adjust taste to your preference. (I usually add a little more peanut butter and curry but go with what you like).

To make the salad:
Wash and remove the thick “stem” from the center of the kale leaves and discard. Cut the kale into thin ribbons. Place the kale in a large salad bowl and pour about 1/4 of the dressing on it.

Mix well (this part is messy) using your HANDS to "massage" or (as my kids say "smush" ) the dressing into the kale leaves for two-to-three minutes. This step breaks down the leaves and makes them nice and tender.

*Wash your hands, they'll be a mess, and then proceed*
I don't always use the entire amount of dressing on my salad, add as much as you prefer after "massaging" kale.
Add shredded carrots, cabbage, cilantro and green onions.
Stir well.
Let the salad sit for about 10 - 15 minutes... if you can stand it.
Garnish with sesame seeds or chopped peanuts.
Enjoy!

Thursday, March 10, 2016

Creamy Cashew-Garlic Alfredo

This is one of the first successful vegan recipes I "wrote", years ago when I was first struggling into veganism, It was a hit then, and it's still my family's first choice when I ask them what they want for dinner.

All my non-vegan friends love this recipe as well, and I'm pretty sure most of them don't even realize it's vegan. Some of them have been known to call me in the middle of the night, begging me to bring some to work the next day.

The sauce is great because it's simple, you probably have the ingredients in your pantry, and it was written to work in your average Target-variety food processor; that's how I've always made it.
However, I recently got a Vita-Mix and I have to tell you, *WOW* it's quite lovely for sauces like this too! I do have to double or triple the sauce to make it mix well in the larger Vita-Mix container. Not a problem...We've been enjoying a LOT of Alfredo lately!!
Use whatever machine you have, it will be delicious...

Cashew Garlic Alfredo Sauce
1/2 cup raw cashews (not roasted)
1-2 tsp. fresh lemon juice (I don't measure, just a good squeeze)
1 1/2 cups boiling water
2 cloves garlic, crushed (or more to taste)
1 Tbsp. extra-virgin olive oil
2 Tb. nutritional yeast (optional)
  • Pulverize raw cashews in the food processor until very fine but do NO turn them into cashew butter. 
  • Add 1 1/2 cups boiling water. (*The BEST way to do this, is to make the sauce while the pasta cooks - scoop out 1 1/2 cups of lightly salted pasta-cooking water and use it - the starch from the pasta-cooking water thickens the sauce PERFECTLY!)
  • Add water to cashews and process until smooth... this will take several minutes.
  • Add nutritional yeast (optional - I love it, but my kids prefer it without), garlic cloves, olive oil and squeeze of lemon juice.Process again until smooth, another couple minutes, it'll start to thicken a bit!
  • Taste and adjust seasonings, adding more lemon, salt, pepper or garlic to your tastes. Makes a decadently creamy sauce! Serve over hot pasta, rice, potatoes, whatever!
This stuff is wonderfully simple and tastes SO very good. I often add sauteed mushrooms, chives, chopped olives or sundried tomatoes, depending on my mood.

Sunday, February 21, 2016

Review of Purple Carrot Meal Service

If you follow me on TwitterInstagram or other social media, you may have seen my recent photos and ravings about the lovely dishes I made from Purple Carrot Meal Service.
One of my readers recently asked my opinion of this relatively new, VEGAN meal service, and so (of course!) a great excuse to check them out!

Purple Carrot (if you haven't seen the ads and checked them out yourself) is a "subscription meal service" similar to Blue Apron, Hello Fresh and others, only it's designed for us vegans!! It was created as a way for people (who have schedules like mine!!) to conveniently create completely delicious and beautiful plant-based meals at home.

You get three meals a week, and you'll be informed what they are ahead of time - you can cancel, skip or pause your service whenever you want.
From their website: "Increasing the amount of real, whole, plant-based foods in your diet may sound challenging, but with The Purple Carrot, it's easier than you think. And with the array of choices we provide each week, you’ll find yourself enjoying more plant-based meals in no time, along with all the benefits they bring."

I first heard about heard about Purple Carrot when Mark Bittman, (author of How to Cook Everything, New York Times columnist, leading advocate for part-time vegan eating and a proponent of ethically-sourced and environmentally friendly food) started working with the company to help create tasty meals and write newsletters.

I LOVE the (many) recipes I've made out of Bittman's cookbook, and the Purple Carrot meals looked and sounded good, but... I was skeptical, because, hey! I enjoy creating and cooking homemade vegan meals for my family.
I think I use a nice variety, and certainly don't view my cooking and meal-making as boring, unoriginal or inconvenient. I wasn't sure a "service" would really be my "thing". 

I received three meal "kits" from Purple Carrot.
They included all of the pre-measured ingredients needed to create complete, unique, plant-based meals. 
So.
My impression?
Well, right off the bat, I realized immediately how MUCH I loved the fact that I didn't have to grocery shop for these meals!!!
Yes, I LOVE cooking, but I may not have mentioned that I LOATHE grocery shopping with every fiber of my being. I live in an area where grocery stores are pretty basic, and some ingredients can be impossible to find. (For example, just last night I scoured all three area grocery stores for sundried tomatoes with no luck. I don't really consider sundried tomatoes to be wildly 'out-of-the-ordinary' anymore, NOR are they worth two hours of my time searching!).
But I digress.

I was suprised at how small the box was, even with adequate cold packs to keep
 everything fresh, 3 meals worth of food didn't take up as much space on my porch as I imagined. (Not to worry, there was PLENTY of food, more on that later).
A newsletter from Bittman and the week's menus and full-color, nicely-detailed cooking instructions are the first things you see when you open the box. There's a thorough explanation of your dishes, a little history about them, and even useful trivia about some of the ingredients. The foodie/blogger/history nerd in me LOVED these details!!

All the food is labelled, well insulated and all of the 
packaging is recyclable/made from post-consumer recycled materials (as a side note here, I LOVED the small baggies and even a small bottle that ingredients were packaged in and have happily found ways to re-use them in packing my work lunches).The produce was all fresh, organic and at least as nice, if not better, than the produce I pick up at my grocer. 

Another thing I immediately LOVED was that their recipes were archived so if I was so inclined (and wanted to race around for hours TRYING to find all the ingredients) I could recreate them myself. Or reference them to get a heads-up on prep needed for next week's meals.
To get an idea how "quick and easy" these meals were to prepare, I let my 22-year-old prepare one meal, my boyfriend another and I prepared the third.
~~~~~~~~~~~~~~~

My daughter, being a pasta lover, chose to make the Fusilli with Mushrooms and Fennel. I felt the mushrooms and fennel might be the most fragile of the produce items we received, and should probably be used first, so we started our week with that. 
Not to fear, I'm sure the veggies could have lasted all week just fine.
My daughter immediately balked because she hadn't had great experiences with whole wheat pasta in the past (I am usually not a fan either) but I reminded her we were going to give everything a try AS written and then decide. I was skeptical as well, because I don't (or... didn't) like fresh tarragon. But she was careful to make the recipe exactly as described, stating several times that it was "really fun" and "way easier than she had thought it would be". She has a good deal of experience in the kitchen but had never used fresh fennel before, so the directions to "core" the fennel stumped her (OK, and me - I've never exactly "cored" fennel before?) but we figured it out. Everything else was perfectly explained and laid out.
I admit we were both pretty unsure the small amount of pasta noodles would be enough to feed two of us, but again, I said "wait and see". The only (very minor) glitch in directions was that the fusilli took considerably longer to cook than the directions stated. 

The final result? A perfect 10+++!
First of all, there was MORE than enough food for two very hearty appetites. We had leftovers.
The meal was SUPER tasty, filling and a different combination of flavors than anything I'd ever made before.
Second, I now LOVE, LOVE, LOVE tarragon, at least in this application. It was PERFECT with the sweet fennel and nutty pecans. I would order this again and again! (I might experiment with adding more white wine for a more "saucy" dish, but believe me, it's also perfect as it is!)
Third, the whole wheat pasta cooked up tender and firm, not at all grainy, bland or mushy as I was thinking it might.
The directions stated 30 minutes prep, and my daughter didn't feel rushed a bit, finishing in 32 min, which was nice, as I never believe those "prep times" set up by cooks other than my own uncoordinated-disorganized self...
- - - - - - - - - - 

My guy offered to tackle the second meal, the Indian inspired Aloo Paratha with Eggplant, and it was an equally huge success. 

Again, he looked somewhat skeptical at the amount of ingredients and said "I'm pretty sure I'll eat all of this" but it ended up being more than enough for two people. Two people with BIG appetites! 
He found the directions straightforward (except he added the entire can of tomatoes- because he didn't want to waste 1/2 a can, and using a garlic press rather than chopping the garlic, neither of which really affected the end result). 

I should add here - Purple Carrot assumes you have basic kitchen tools (knife,  a pan or two, vegetable peeler, etc) and salt, pepper and oil. Literally every other ingredient is provided. My guy remarked that even back in his sparsely equipped bachelor-apartment-days, he probably would have been able to prepare these meals easily. (Just an idea for all you singles out there needing a delicious meal to whip up quickly for date night! I think ANY of these meals would qualify and impress!)
- - - - - - - - - - 

On the final night, I made the Chilaquiles with Edamame Guacamole and Pickled Carrots.
 I LOVE chiliquiles but hadn't really found a vegan interpretation that I was crazy about. I have to say, no tofu, no fake egg or cheese, this version was SO well done! I'd never thought about adding edamame to my guacamole either, but it turned out to be a great idea! 
As before this meal was also a super delicious, well thought-out and filling. (Do you sense a theme? I swear I am not exaggerating my enthusiasm here!). 

The crispy chips covered with a savory sauce and topped with guac ended up being my daughter's (she's NOT-vegan, by the way!) favorite of the three meals, though I can tell you we all loved everything just about equally.
It was probably the "lightest" of the three meals, but still resulted in two very full plates (see my pix).

I found directions easy. The number of prep steps MAY seem overwhelming when you first glance at it (at least to me,a NON recipe-follower, HA!), but it's really not bad at all - everything is explained in detail and every step makes sense. The only glitch in this meal was the instruction card said "12 oz. carrots" and I could tell just by looking that there was way more than 12 oz. of carrots included in my box. 
A bonus isn't a bad thing, especially carrots, though I suppose it could throw off the meal proportions if you aren't paying attention.
~~~~~~~~~~~~~~~
As with any service like this, I would suggest looking through your produce and making your meals with the more fragile produce first, everything is packed to last for a week (and I think it would last past that!) but I tend to like salad greens and mushrooms as fresh as possible.
Am I still a skeptic? Not at all! l'd recommend these to ANYONE (vegan or not!) without hesitation.
I still love inventing, creating and cooking my own meals, but the convenience of having every single ingredient for some very unique, tasty recipes (that turn out JUST as described) delivered to my front porch? So, so, so awesome!
I felt the price was more than reasonable, even as thrifty as I am with grocery shopping, and I am not ashamed to admit I will be using (and very likely gifting to others!!) this service at times in the future, FOR SURE!

Saturday, January 23, 2016

Pasta with Roasted Eggplant, Kalamata Olives and Burst Grape Tomatoes

Oh, yummmm.
This has become a huge "go-to" winter favorite with my family the past several years and I realized, as seems to be the case with many of my recipes, I haven't shared it with you! And that's a shame, because it is fast and easy (despite a long list of directions) and sooooo good.

 My kids are HUGE Kalamata olive fans and they're always begging me to put olives in everything. These olives might not be the most budget-friendly ingredient (try to find them pitted, at an "olive bar", for the best price) but a few go a long ways, packing a lot of flavor, so I usually have a deli container of them in my fridge.

They're a perfect fit with this dish; salty olives, combined with the earthy, roasted eggplant and sweet tomatoes make a very flavorful combo! Plus, we all know that olives have loads of antioxidants and anti-inflammatory properties, right?

I use whole wheat angel hair pasta here because when I first switched to using whole-grain pasta, my kids just weren't sold on its texture. Angel-hair seemed to be the most accepted variety, it cooked up tender and the texture was similar to "regular" pasta. Everyone likes whole wheat pasta in any shape or size now, but I still use angel-hair in this dish because that's how I did the original recipe. It can get mushy quickly, but will hold it's shape nicely if not overcooked. Use whatever pasta you prefer, but if you're new to whole wheat pasta, or just not a fan, I highly recommend trying angel-hair!

I especially miss my fresh, garden tomatoes in the middle of the winter, and roasting a few, tiny, sweet, store-bought "grape" tomatoes just until their skins burst intensifies their flavor and almost makes up for a lack of home-grown, summer tomato goodness.
Pasta with Roasted Eggplant, Kalamata Olives and Burst Grape Tomatoes
Olive oil
2 large eggplants, quartered
Kosher salt
1 tub of grape or cherry tomatoes (about 2 cups)
2 whole garlic cloves, peeled, and crushed
1 cup of Kalamata olives, quartered or very roughly chopped
2 Tablespoons Kalamata olive brine
3 Tablespoons chopped Italian parsley
1/4 cup nutritional yeast
Freshly ground black pepper
1 1/2 pounds dry whole-wheat spaghetti or angel-hair pasta

Directions: 
-Heat oven to 450°.
-Quarter eggplant lengthwise into wedges, and coat lightly with olive oil (eggplants will absorb olive oil quickly, so I have the best luck coating them with my hands for a quick, even, but not saturated layer of olive oil).
-Put eggplant on baking sheet, skin side down, sprinkle with salt and roast in the middle of the oven, turning once or twice, until very soft when pierced with fork, about 15 - 20 min depending on size of eggplant.
-Remove eggplant, stab all over with fork, and place, cut side down, on a layer of paper towels to drain and cool for 5- 10 min. while chopping olives and parsley.
-Chop olives (I'm a little OCD and prefer individually quartering each olive because I much prefer uniform olive pieces and not tiny black bits in my pasta, but it IS time-consuming - do what works for you!!) and chop parsley.
-Once eggplant is cool, roughly chop into 1-inch+ pieces. (You can peel the skin if you want, but we don't mind it - taste it to see, some eggplant skins seem to hold a bit of bitterness while others don't)
-In large skillet, heat a Tablespoon of olive oil.
-Add tomatoes and stir gently over high heat for about three minutes, until starting to warm through.
-Add crushed garlic and eggplant to skillet.
-Lower heat to medium, continue to stir gently, occasionally, JUST until tomato skins begin to wrinkle and one or two have burst. Gently stir in olives.
-Remove from heat and set aside.
-In a large pot, boil water and cook pasta according to package directions.
-When pasta is al dente, remove 1 cup of the cooking water, set aside, and then drain pasta.
-Put drained pasta in the skillet with eggplant and tomatoes, over medium heat.
-Stir/toss together gently - tongs work best here.
-Add Kalamata olive brine, 1/2 cup of the pasta cooking water and the parsley and Nutritional yeast
-Toss to mix, add more cooking water if needed, (you want the pasta moist but not "soupy"), season with salt (if needed) and a generous amount of fresh-ground black pepper.
-Enjoy!
**NOTE: If the tomatoes have not "burst" (and not all of them will) upon serving, stab those little suckers with a fork right before eating them, the juice inside is VERY HOT!!